Your Tech Story

Tech tips

Top 5 Ways to Turn Off Safe Mode on Your Samsung Phone (2024)

Top 5 Ways to Turn Off Safe Mode on Your Samsung Phone (2024)

Top 5 Ways to Turn Off Safe Mode on Your Samsung Phone (2024)

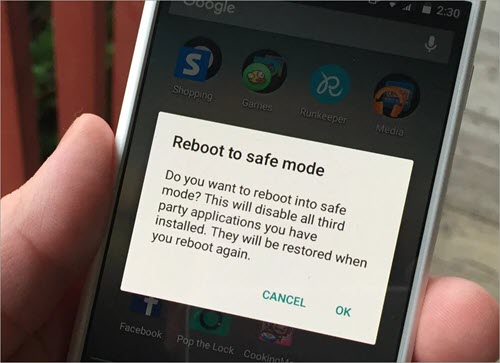
Image Source: softwaretestinghelp.com

Safe Mode is a diagnostic tool integrated into many smartphones, including Samsung devices. This allows you to boot your phone with only essential system apps running, helping you identify if a third-party app is causing problems like crashes, battery drain, or slow performance. However, once you complete your diagnosis or if you accidentally enter Safe Mode, you need to know how to get out of it.

Step 1: Restart Your Phone

The simplest way to exit safe mode is to restart your device. This method resolves the issue most of the time:

  • Press and hold the power button on your Samsung phone until the power option comes up.

  • Tap on ‘Restart’ or ‘Reboot’ in the power menu.

  • Let the device turn off and then turn it back on. Verify if it starts normally, not in safe mode.

Step 2: Use the Notifications Panel

Samsung phones often provide a quick toggle to exit safe mode directly from the notifications panel:

  • You can simply swipe down from the top of your screen to open the notification panel.

  • Look for a notification that says ‘Safe mode is on’ or similar.

  • Tap on this notification, and you will usually see an option to ‘Turn off Safe mode’. Tap it, and your phone will restart in normal mode.

Step 3: Check the Volume Buttons

Sometimes, safe mode is activated because of an issue with the volume buttons. If your phone continues to boot in safe mode after a restart, inspect the volume down button:

  • Make sure the Volume Down button is not stuck or jammed. If it is, try gently wiggling it to free it up.

  • Once the button is free, restart your phone again to see if it boots normally.

Step 4: Uninstall Problematic Apps

If your Samsung phone still boots into safe mode after trying the above steps, a recently installed app might be causing the issue:

  • While in safe mode, navigate to Settings > Apps.

  • Scroll through the list of installed apps and look for any that you downloaded shortly before the problem started.

  • Tap on the suspicious app, then select ‘Uninstall’ to remove it from your device.

  • Restart your phone to see if it now boots normally.

Step 5: Factory Reset

If all other methods fail, it may be necessary to perform a factory reset as a last resort. This will erase all data from your device, so ensure you back up your files first:

  • Navigate to Settings, select General Management, then Reset, and choose Factory Data Reset.

  • Review the information on the screen, back up your data, and then tap ‘Reset’.

  • Proceed by following the on-screen instructions to finalize the reset process.

Conclusion

Exiting safe mode on Samsung phones usually involves simple steps like restarting or tapping a notification. However, persistent problems may require more thorough troubleshooting such as checking for faulty buttons or uninstalling apps. If all else fails, a factory reset should be your last course of action. Remember, the steps above may vary slightly depending on your Samsung model and software version, but they provide a general guide for 2024 models.
How to Reset Apple AirPods: A Complete Guide

How to Reset Apple AirPods: A Complete Guide

How to Reset Apple AirPods: A Complete Guide

Image Source: youtube.com

Resetting Apple AirPods is a straightforward process that can help resolve many issues like connectivity issues, battery anomalies, etc. Whether you’re troubleshooting a problem or preparing to sell your AirPods, resetting them to their factory settings is a useful step.

Understanding When to Reset Your AirPods

Resetting your AirPods should be considered when you encounter issues like:

  • Persistent connectivity problems with your devices.

  • Audio glitches, such as uneven sound delivery or intermittent dropouts.

  • Failure to charge properly or uneven battery levels between the AirPods.

Preparing to Reset Your AirPods

Before you initiate the reset process, ensure the following:

  • Your AirPods are charged sufficiently or placed in their case with the case lid open.

  • You have access to your paired iOS device to manage settings or to re-pair the devices afterward.

Step-by-Step Guide to Resetting Apple AirPods

  1. Locate the Setup Button: Find the setup button on the back of your AirPods charging case.

  2. Place AirPods in the Case: Insert both AirPods into their charging case and close the lid. Open the lid after 15 seconds.

  3. Initiate the Reset Process: After opening the lid, press and hold the setup button for about 15 seconds, or until the status light flashes amber and then white.

  4. Complete the Reset: Once the white light flashes, your AirPods have been successfully reset. Your AirPods are set to pair once more.

Reconnecting Your Reset AirPods

After resetting your AirPods, you will need to reconnect them to your Apple devices:

  • Bring the AirPods near your device and open the lid. Your iOS device should prompt a setup animation.

  • Adhere to the displayed guidelines to reconnect your AirPods.

Ensuring Successful Reset and Reconnection

If you face issues during the reset or reconnection process, consider these tips:

  • Make sure that your device’s Bluetooth function is turned on.

  • Verify that your iOS device is updated to the latest version to ensure compatibility and smooth functioning.

  • If the AirPods still don’t reconnect, repeat the reset process or consult Apple Support for further assistance.

Maintaining Your AirPods After Reset

To keep your AirPods in optimal condition:

  • Regularly clean your AirPods and charging case with a soft, dry, lint-free cloth.

  • Avoid exposing them to liquids or humid environments.

  • Store your AirPods in their case when not in use to maintain battery life.

Conclusion

Resetting your Apple AirPods can solve a variety of problems and is easy to do. By following the steps outlined above, you can ensure that your AirPods work as expected and maintain their connectivity and performance. Remember to handle your AirPods with carefully and keep them clean for the best experience.

This guide will help you manage your AirPods with confidence and enjoy seamless audio performance. Whether you’re setting up a new pair of AirPods or troubleshooting, a reset can often be the quick fix you need.

Quick Fixes for Epson Printer Offline Error on Mac and iPhone

Quick Fixes for Epson Printer Offline Error on Mac and iPhone

Encountering printer offline error can be quite frustrating especially when you need to print documents urgently. If you are using an Epson printer with a Mac or iPhone and encounter this issue, don’t worry. There are several troubleshooting steps you can follow to resolve this issue and get your printer back online.

Understanding the Printer Offline Error

Quick Fixes for Epson Printer Offline Error on Mac and iPhone

Image Source: epsonprintersupportpro.us

The “Offline” printer status indicates that your computer or iPhone cannot communicate with the printer. This problem can arise due to various reasons, such as connectivity issues, outdated printer drivers, or incorrect printer settings. Identifying the source of the cause is the first step toward fixing the problem.

Initial Checks

Before proceeding with more complex solutions, perform these basic checks:

  • Ensure the Printer is Turned On: It might seem obvious, but sometimes the printer might be off or in sleep mode.

  • Check the Connection: Make sure your Epson printer is properly connected to your Mac or iPhone, whether through Wi-Fi or a cable.

Fixing Epson Printer Offline Error on Mac

  • Check Printer Queue: Open ‘System Preferences’ > ‘Printers & Scanners’. Select your printer and open the queue. If there are any stalled print jobs, remove them.

  • Delete and Re-Add Printer: Sometimes, removing the printer from your list and adding it back can resolve the issue. Go to ‘Printers & Scanners’, select your printer, click the ‘-‘ button to remove it, then click the ‘+’ button to add it back.

  • Update Printer Drivers: Ensure your printer’s drivers are up to date. You can download the latest drivers from Epson’s official website.

Fixing Epson Printer Offline Error on iPhone

  • Restart Your Printer and iPhone: A simple restart can often fix connectivity issues. Turn off your printer and iPhone, wait a few minutes, and then turn them back on.

  • Check Wi-Fi Connection: Ensure both your iPhone and printer are connected to the same Wi-Fi network.

  • Use AirPrint: Make sure you’re using AirPrint, Apple’s printing technology. Go to the document or photo you want to print, tap the share icon, and select ‘Print’. Ensure your Epson printer is selected.

Advanced Troubleshooting Steps

If the issue persists, consider these advanced steps:

  • Reset Printing System: On your Mac, right-click the printer list in ‘Printers & Scanners’ and select ‘Reset printing system’. This will remove all printers and scanners and their jobs. Re-add your printer.

  • Firmware Update: Check for any firmware updates for your Epson printer on the Epson support site.

Conclusion

Dealing with the printer offline error can be a hassle, but with these troubleshooting steps, you will be able to get your Epson printer back online on both Mac and iPhone. Many such issues can be prevented with regular maintenance. If you are experiencing persistent issues, it is recommended to contact Epson support for further assistance.

Remember, the key to a smooth printing experience is to ensure that your equipment communicates effectively with your printer. By following the steps outlined above, you are on your way to hassle-free printing.

FAQs

  1. Why does my printer keep going offline?

    • This can be due to connectivity issues, power-saving modes, or problems with your printer’s settings or drivers.

  2. Can outdated drivers cause offline printer errors?

    • Yes, outdated or corrupt drivers can prevent your computer or iPhone from communicating with your printer, causing it to appear offline.

  3. How do I know if my printer is AirPrint-enabled?

    • Check your printer’s specifications on the Epson website or look for the AirPrint logo on your printer or its box.

  4. What should I do if none of these steps work?

    • Contact Epson support for professional assistance. There might be a hardware issue or a more complex software problem.

  5. How can I prevent going offline in the future?

    • Regularly update your printer’s drivers and firmware, ensure stable connectivity, and check the printer’s settings for any issues that might cause it to go offline.

Exploring the Benefits of Virtual Credit Cards and How to Get Them

Exploring the Benefits of Virtual Credit Cards and How to Get Them

A virtual credit card provides a safe substitute for physical credit cards in the current era of digital transactions. Let’s explore the features of a virtual credit card and the easy way to apply for one.

Comprehending Virtual Credit Cards

Exploring the Benefits of Virtual Credit Cards and How to Get Them

Image Source: wsj.com

A virtual credit card does not have any physical presence; it functions exclusively online. It works similarly to a regular credit card in that all the necessary information is available online, including the card number, expiration date, and CVV.

Important Elements

Specifically designed for online purchases, virtual credit cards have the following unique features:

Limited Validity

To provide increased security, these cards normally only last for a single transaction or for a maximum of 24 or 48 hours.

Improved Security

Virtual Credit Cards provide a safe payment method for digital transactions by reducing the possibility of security breaches and cyber-attacks because critical information is not kept online.

Simple Accessibility

Getting a virtual credit card is a stress-free process that allows for seamless integration with your digital wallet. It is instantly available via mobile applications and bank websites.

How Can I Get a Credit Card Online?

Getting a virtual credit card is a simple procedure:

Check Issuer Availability

Find out if the virtual credit card is something your credit card issuer provides as part of their offerings. This function is offered by major issuers including Citi, Capital One, and American Express.

Enrollment Procedure

Visit your issuer’s website or other platform to apply for a virtual credit card. For online transactions, the process usually entails creating a distinct virtual card number, however it may differ according to the issuer.

Usage Guidelines

After enrolling, you may begin making online purchases with your virtual credit card. To securely complete transactions, enter the virtual card data during the checkout process on merchant websites.

Advantages and Things to Think About

Virtual credit cards protect your private details from possible hacking by adding an extra degree of protection to online purchases. There could be certain limits, though, such as those about in-store usage and return guidelines for purchases bought using virtual cards.

In a nutshell, virtual credit cards offer a dependable way to make safe online payments, providing comfort in the face of constantly changing security threats in the digital world. Enrolling in a virtual credit card, if provided by your credit card issuer, can improve your online purchasing experience by providing extra protection.

 
How to Record Calls on an iPhone: Step-by-Step

How to Record Calls on an iPhone: Step-by-Step

How to Record Calls on an iPhone: Step-by-Step

Image Source: youtube.com

Recording phone calls on an iPhone can be incredibly useful for various purposes, from capturing important conversations to preserving memories. However, due to legal restrictions and privacy concerns, Apple has not provided an in-built call recording feature in iOS. Nonetheless, there are several ways to record phone calls on an iPhone using third-party apps and external devices. In this article, we’ll explore some of the most effective methods for recording phone calls on your iPhone.

Using Third-Party Apps

TapeACall Pro

TapeACall Pro is a popular app available on the App Store that allows you to record incoming and outgoing calls effortlessly. After installing the app, you can initiate recording by merging calls or using the app’s dial-in feature. The recordings are saved securely on the app’s server, and you can easily share or download them as needed.

Rev Call Recorder

Rev Call Recorder is another reliable option for recording calls on your iPhone. It offers unlimited recording time and high-quality audio playback. The app also provides transcription services, allowing you to convert your recordings into text for easy reference and searchability.

Google Voice

Google Voice is a free service that allows you to record incoming calls on your iPhone. You can enable call recording in the Google Voice settings, and all incoming calls will be automatically recorded. The recordings are accessible via the Google Voice app or website, where you can listen to them or download them to your device.

Using External Devices:

Call Recording Devices

There are several external call recording devices available in the market that can be connected to your iPhone via the headphone jack or lightning port. These devices capture both sides of the conversation directly without relying on software. Examples of such devices include the RecorderGear PR200 and the Esonic Cell Phone Call Recorder.

Using a Second Phone

Another method is to use a second phone to record the call. You can place the call on speakerphone and use the second phone’s voice recording feature or a dedicated recording app to capture the conversation. This method is straightforward but may result in lower audio quality depending on the devices used.

Legal and Ethical Considerations

Before recording any phone calls, it’s crucial to be aware of the legal and ethical considerations in your region. In many jurisdictions, recording phone calls without the consent of all parties involved is illegal and can result in serious consequences.

In conclusion, while Apple does not provide native call recording functionality on iPhones, there are several third-party apps and external devices that enable you to record phone calls effectively. Always ensure you comply with legal requirements and respect privacy when recording phone conversations.

How to Report Abuse Content on Facebook, X, and Instagram

How to Report Abuse Content on Facebook, X, and Instagram

Social media platforms enable people to freely express themselves in the modern digital age by giving them a forum to communicate their thoughts and opinions. But even in the midst of this freedom, rude, deceptive, abusive, or erroneous content can frequently spread. Major social networks have put in place systems for people to report such stuff, whether it be postings or full accounts, after realising how difficult it may be. Not only does reporting abusive content contribute to the upkeep of a safer online community, but it also helps enforce community standards and terms of service.

Report Abuse on Facebook

Facebook offers users an easy way to report posts and accounts that do not adhere to community standards. If a person would like to report a specific post or remark, they can click the ellipsis button next to the content and choose “Report post.” From there, users have a selection of pre-established causes to pick from, such as hate speech, spam, false news, harassment, nudity, and more. Users might be asked for more information to properly define the problem, depending on the reason they have chosen. Similar procedures can be used to report entire sites or accounts, guaranteeing that incorrect content is dealt with promptly.

Handling Reports of Abuse on X (Twitter)

How to Report Abuse Content on Facebook, X, and Instagram

Image Source: pcmag.com

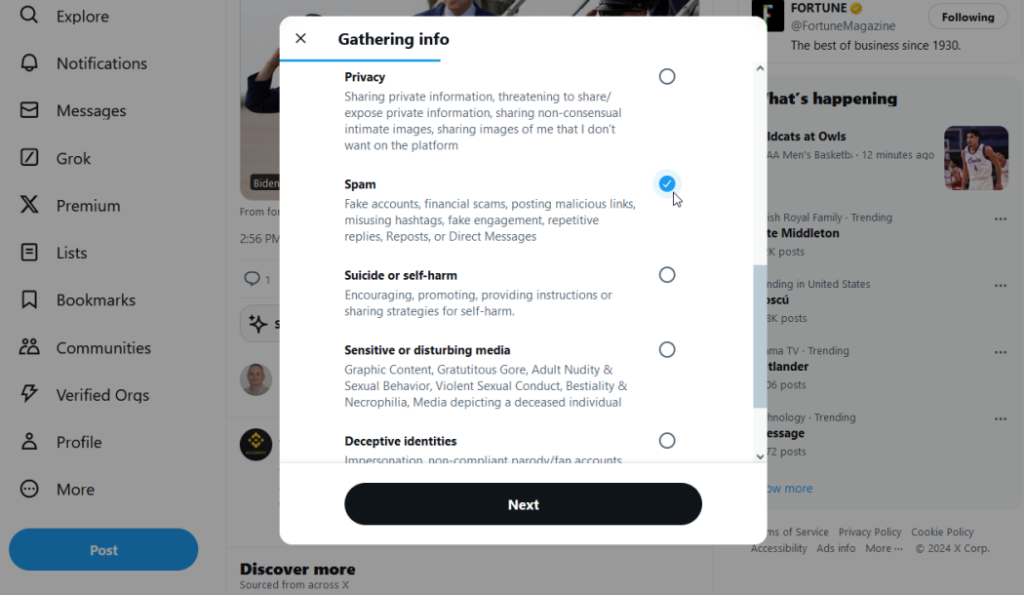
X, formerly known as Twitter, also allows users to easily report offensive information. Users have the option to report content for a variety of reasons, such as hate speech, abuse and harassment, privacy issues, or false identity fabrication, by clicking the down arrow next to a tweet and choosing “Report Post.” Like Facebook, users can see extra panels asking for more information depending on the reason they choose. To ensure thorough reporting capabilities, users can also report entire accounts by selecting the report option from the account’s profile.

Taking Action Against Abuse on Instagram

Instagram, a well-liked site for sharing visual images, also puts its users’ safety and wellbeing first by making abuse reporting features easier to access. When users come across abusive stories, accounts, or postings, they can use the ellipsis menu to access the report option and choose “Report.” Instagram provides a number of reasons to report, addressing topics such as bullying, hate speech, misinformation, scams, and more. Users may need to supply more background, depending on the reason they have chosen, in order to guarantee appropriate assessment and action. In addition, Instagram gives users the ability to block reported accounts, which improves user safety and gives them more control over their digital life.

Conclusion

Sustaining a positive online community and combating abuse are still critical as social media continues to change. Through familiarising themselves with the reporting procedures delineated by social media platforms such as Facebook, X, and Instagram, users can make a proactive contribution towards countering abuse and guaranteeing a safer online environment for everybody. Not only does reporting abusive information safeguard specific users, but it also preserves the integrity and principles of these social media sites, creating a setting that is favourable to constructive dialogue and well-meaning contact. Together, let’s use reporting’s ability to purge social media and advance an online community that values honesty, decency, and safety.