Your Tech Story

Tech tips

How to Mirror Your iPhone Screen on a Computer?

How to Mirror Your iPhone Screen on a Computer?

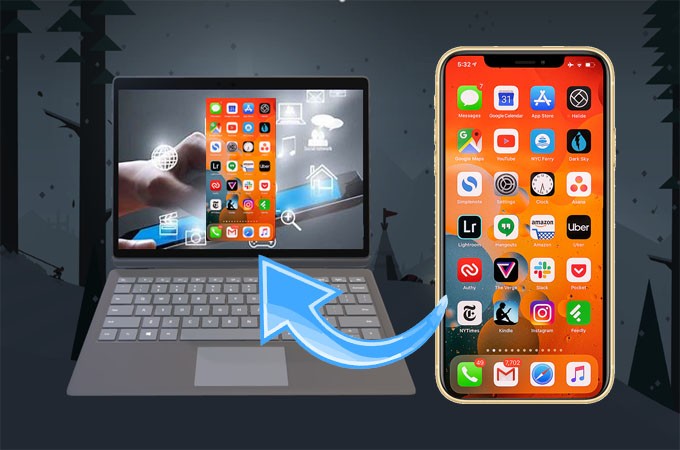
Mirroring your iPhone screen to a computer lets you display your phone’s content on a larger screen, which is ideal for presentations, streaming media or gaming. This can be achieved wirelessly using AirPlay with the Apple TV or through various third-party applications that are compatible with both Mac and Windows Pcs. This feature enhances the usefulness of your iPhone by offering a larger display and interactive capabilities, making it a valuable device for both personal and business use.

Why Mirror Your iPhone?

Screen mirroring offers many benefits, including an enhanced viewing experience, easy content sharing, and impressive display capabilities.

Method 1: Using AirPlay with Apple TV

How to Mirror Your iPhone Screen on a Computer?

Image Source: letsview.com

If you have an Apple TV, you can use AirPlay to mirror your iPhone screen wirelessly. Make sure both devices are on the same Wi-Fi network, swipe down to access Control Center on your iPhone, tap “Screen Mirroring” and select your Apple TV.

Method 2: Mirroring via Third-Party Apps

Many third-party apps like Reflector and AirServer allow you to mirror your iPhone to a computer. These apps work by creating a connection on the same Wi-Fi network.

Method 3: Connecting with a Lightning Cable

For a more stable connection, use a Lightning cable to connect your iPhone directly to your computer. This method is particularly effective for avoiding lag or connection problems.

Method 4: Utilizing QuickTime on Mac

Mac users can use QuickTime Player for screen mirroring. Connect your iPhone to your Mac, open QuickTime Player, select ‘File’, then ‘New Movie Recording’, and select your iPhone as the camera source.

Screen Mirroring for Windows Users

Windows users can mirror their iPhone screen using third-party applications like ApowerMirror or LonelyScreen, which emulate an AirPlay receiver on a PC.

Troubleshooting Common Mirroring Issues

Common issues include connectivity problems and lag. Restarting the device, checking the Wi-Fi connection, and updating the software may resolve these issues.

Enhancing Your Mirroring Experience

For the best experience, ensure a strong Wi-Fi connection, consider using a wired connection for stability, and close unnecessary background apps.

Security Considerations in Screen Mirroring

Be conscious of privacy and security. Avoid mirroring sensitive information in public areas and ensure a secure Wi-Fi network when mirroring.

Creative Uses of Screen Mirroring

Screen mirroring can be used for gaming, watching videos, group presentations, and more, providing a versatile tool for both personal and business use.

Conclusion

Mirroring your iPhone screen to a computer is a simple yet powerful tool. Whether for work or play, these methods provide flexibility and enhance your digital experience.

How to Delete Voicemail in iPhone (2024)

How to Delete Voicemail in iPhone (2024)

In 2024, managing voicemails on your iPhone remains an essential aspect of digital communication. With voicemails often containing important messages, it’s crucial to know how to delete them effectively, both to manage storage and maintain privacy. Here’s a comprehensive guide on how to delete voicemails on an iPhone.

Understanding iPhone's Voicemail System

The iPhone’s voicemail system is an integral part of its communications features, storing audio messages for when you miss a call.

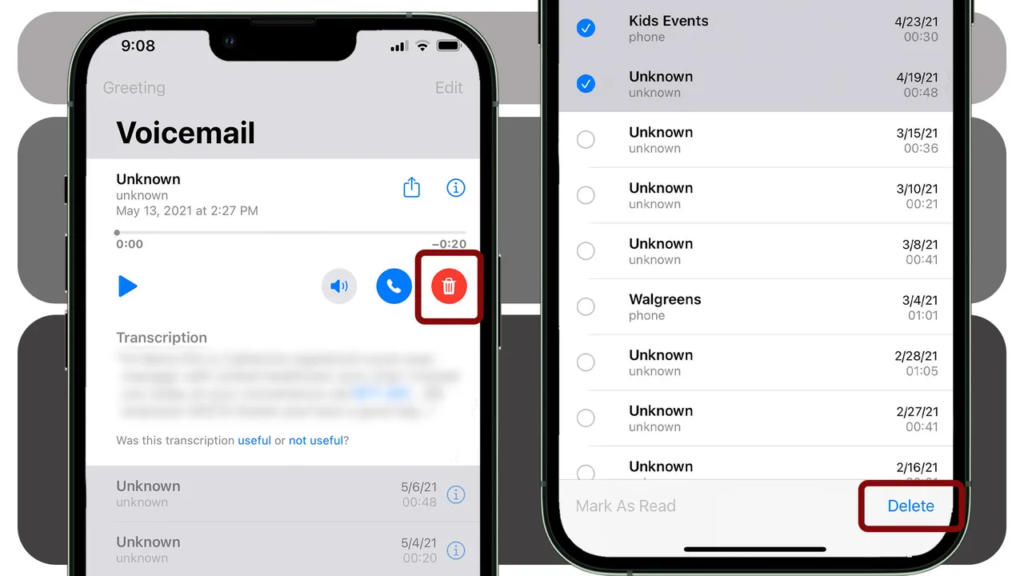
Way 1: Deleting Voicemails Directly from the Voicemail Tab

You can easily delete individual voicemails in the Voicemail tab.

  • Go to the Phone app

  • Swiping left on voicemail

  • Tap “Delete”.

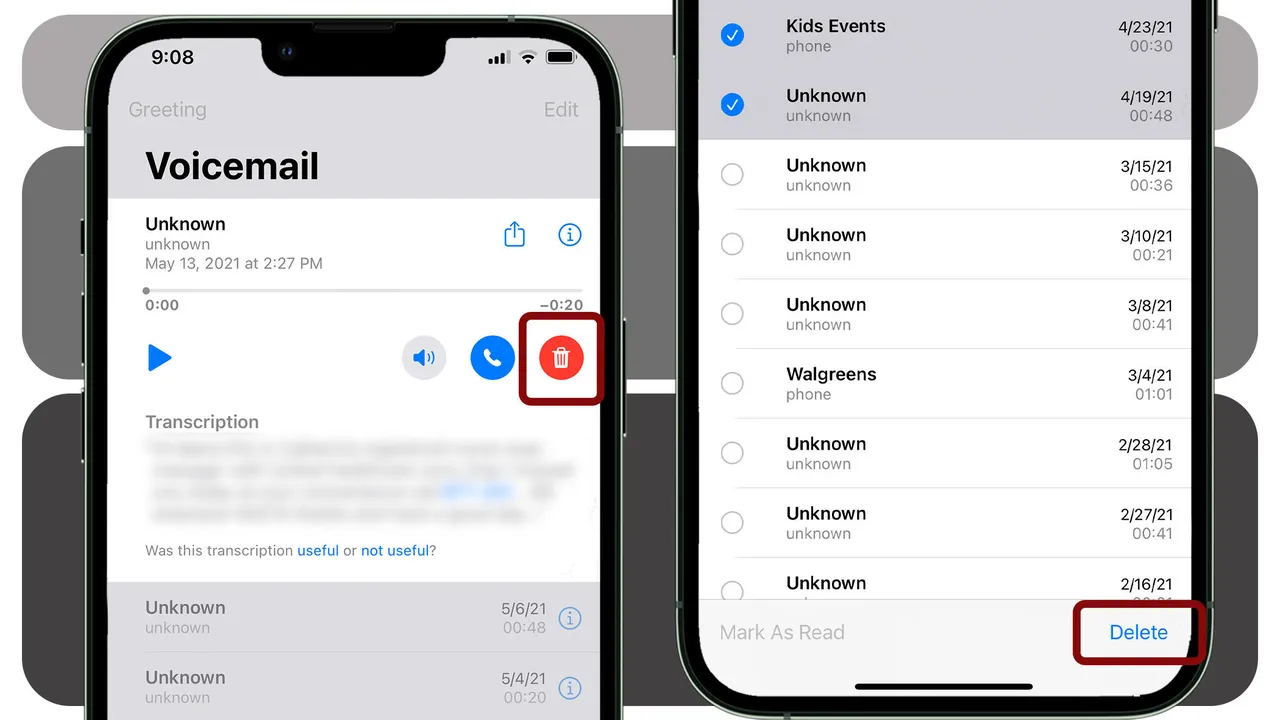
Way 2: Using the Phone App to Delete Multiple Voicemails

  • Go to the Phone app

  • Tap “Edit”

  • Select voicemail

  • And then tap “Delete”.

Way 3: Clearing Voicemails from the Recycle Bin

Voicemails are not completely deleted until they are removed from the “Recycle Bin” folder.

    • Go to the Phone app

    • Click on the Voicemail tab

    • Scroll to the bottom of the page and click on “Deleted Messages”

    • Click on the “Clear All” option

    • Confirm your selection in the popup box.

Tips for Effective Voicemail Management

How to Delete Voicemail in iPhone (2024)

Image Source: zdnet.com

Effective voicemail management is essential to maintain clear and efficient communication. Key tips include regularly reviewing and deleting old messages to avoid a full inbox, using organizational features to categorize and prioritize important voicemails, and setting clear greetings to guide callers.

Troubleshooting Common Voicemail Issues

Troubleshooting common voicemail issues usually involves a few important steps to ensure smooth functioning. First, check your network connection, as connectivity issues often hinder voicemail services. If voicemails are not being received, verify your voicemail settings and make sure the service is set up correctly. Resetting your voicemail password may resolve access issues. For technical glitches, restarting your phone can often resolve minor software issues.

Conclusion

In conclusion, deleting voicemail on iPhone in 2024 is a straightforward process that can significantly increase the efficiency and organization of your device. Be it deleting individual messages, bulk deletion, or clearing your ‘Deleted Messages’ folder, each method plays an important role in managing your voicemails effectively. By following these simple steps and tips, you can ensure that your iPhone’s voicemail remains organized, up-to-date, and free of unnecessary clutter, leading to a more streamlined and productive communication experience.

Top 5 Easy Ways to Fix ‘AirPods Pro Microphone Not Working

Top 5 Easy Ways to Fix ‘AirPods Pro Microphone Not Working

The AirPods Pro, known for their seamless connectivity and impressive sound quality, are a go-to choice for many seeking a wireless audio experience. However, like any technological marvel, they aren’t immune to glitches. One common issue users encounter is the microphone malfunction.

If you’re facing this snag, fret not! Here are five easy solutions to get your AirPods Pro microphone back on track:

1. Check for Firmware Updates

Apple regularly releases firmware updates to improve device performance and address issues. Ensure your AirPods Pro have the latest firmware installed. To check and update:

  • Connect your AirPods Pro to your iOS device.
  • Go to “Settings” > “General” > “About” > “AirPods.”
  • If an update is available, you’ll see an option to install it.

2. Clean the Microphone and Mesh

Top 5 Easy Ways to Fix ‘AirPods Pro Microphone Not Working

Image Source: businessinsider.com

Dust and debris can obstruct the microphone and cause disruptions in audio quality. Gently clean the microphone area and mesh with a soft-bristled brush or a clean, dry toothbrush. Be cautious not to apply excessive pressure to avoid damaging the delicate components.

3. Reset AirPods Pro Settings

Resetting your AirPods Pro settings can resolve various connectivity and functionality issues. To do this:

  • Place your AirPods Pro in their case and keep the lid open.
  • Press and hold the setup button on the back of the case until the status light flashes amber, then white.
  • Reconnect the AirPods Pro to your device and check if the microphone works.

4. Adjust Bluetooth Settings

Sometimes, connectivity settings can hinder the microphone’s functionality. Try disconnecting and reconnecting your AirPods Pro:

  • Open “Settings” on your device.
  • Navigate to “Bluetooth” and locate your AirPods Pro in the list of devices.
  • Tap the (i) icon next to your AirPods Pro and select “Forget This Device.”
  • Reconnect your AirPods Pro by placing them near your device and following the pairing instructions.

5. Update iOS or Device Software

An outdated operating system can lead to compatibility issues with your AirPods Pro. Ensure your iOS or device software is up to date:

  • For iOS devices: Go to “Settings” > “General” > “Software Update.”
  • For other devices: Check the respective system settings for software updates and install any available updates.

If these troubleshooting steps don’t resolve the microphone problem with your AirPods Pro, consider contacting Apple Support or visiting an authorized service center for further assistance. Additionally, if your AirPods Pro are under warranty, you may be eligible for a replacement if the issue persists.

Remember, maintaining your AirPods Pro by keeping them clean and updated can prevent many issues from occurring. Hopefully, these tips will help you quickly resolve the microphone problem and get back to enjoying the fantastic audio experience that AirPods Pro offer!

How to Find or Track Your iPhone Even When It’s Switched Off

How to Find or Track Your iPhone Even When It’s Switched Off

Losing your iPhone can be nerve-wracking, especially when it’s switched off. However, Apple’s innovative technologies and features can still help you locate your device, even in such circumstances. Here’s a comprehensive guide on how to find or track your iPhone even when it’s switched off.

1. Use 'Find My' App

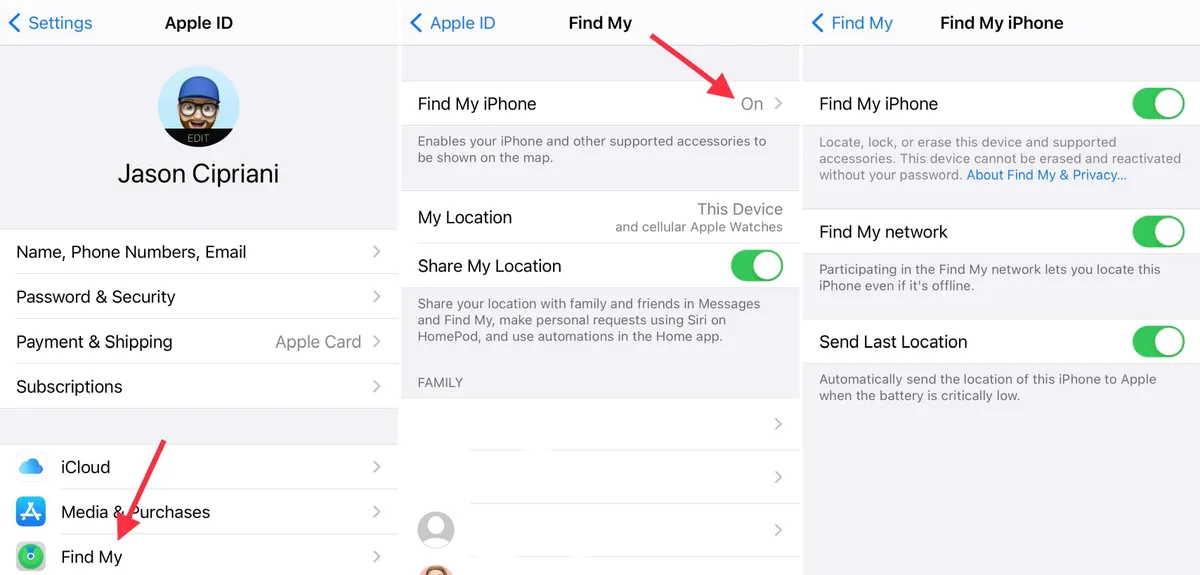
Apple’s ‘Find My’ app is a lifesaver when it comes to locating a missing or switched-off iPhone. The app utilizes the device’s last known location, allowing you to view it on a map. Follow these steps:

  • Open the ‘Find My’ app on another Apple device or access it via iCloud.com.
  • Choose the missing device from the list.
  • Check the last known location. Even if the phone is switched off, the app might display its last location before it powered down.

2. Activate 'Lost Mode'

How to Find or Track Your iPhone Even When It’s Switched Off

Image Source: cnet.com

Activate ‘Lost Mode’ via the ‘Find My’ app or iCloud. This feature allows you to remotely lock your device with a passcode, display a custom message on the screen (such as a contact number), and track the device’s movement when it’s turned on again.

3. Enable 'Notify When Found'

This feature, available in the ‘Find My’ app, alerts you when your device connects to the internet. Once the iPhone is turned on, it sends a notification, allowing you to track it in real-time.

4. Contact Your Service Provider

Your service provider might assist in locating your iPhone, even when it’s switched off. They can track the phone’s last known cellular signal to narrow down its location.

5. File a Police Report

If your iPhone is stolen, filing a police report with the device’s serial number might help track it down. Law enforcement can collaborate with Apple to locate it, even if it’s switched off.

6. Preventive Measures

  • Activation Lock: Ensure ‘Find My iPhone’ and ‘Activation Lock’ are activated in settings. These features prevent others from turning off ‘Find My’ and erasing your device without your Apple ID and password.
  • Regular Backups: Regularly back up your iPhone data on iCloud or a computer. This ensures that even if the device is lost or stolen, your data remains safe.

7. Third-Party Tracking Apps

There are several third-party apps available that claim to track iPhones even when switched off. Research and choose reputable apps with good user reviews before installing them.

8. Be Cautious with Personal Information

Avoid sharing sensitive personal information on your device or any apps that might compromise your privacy if the phone falls into the wrong hands.

9. Check Local Laws

Always be mindful of local laws and regulations regarding tracking devices. Some actions might infringe upon privacy laws, so it’s essential to stay within legal boundaries.

Losing a switched-off iPhone can be stressful, but Apple’s ‘Find My’ app and associated features offer substantial hope for its recovery. By taking proactive measures and utilizing available resources, you increase the chances of locating your device even when it’s powered down. Remember, swift action and proper utilization of these features are crucial in retrieving your lost or stolen iPhone.

What Is iCloud+? Apple's Cloud-Based Storage Service Explained

What Is iCloud+? Apple’s Cloud-Based Storage Service Explained

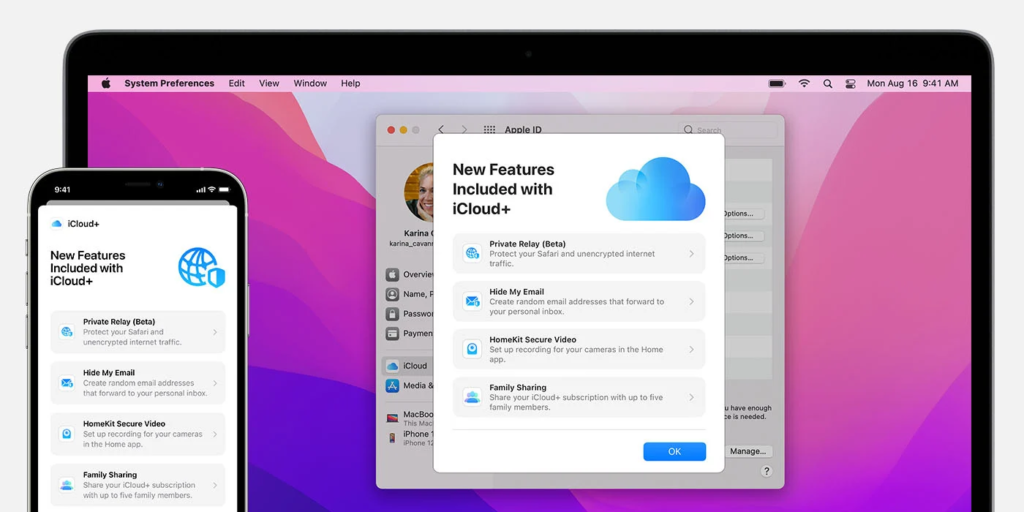
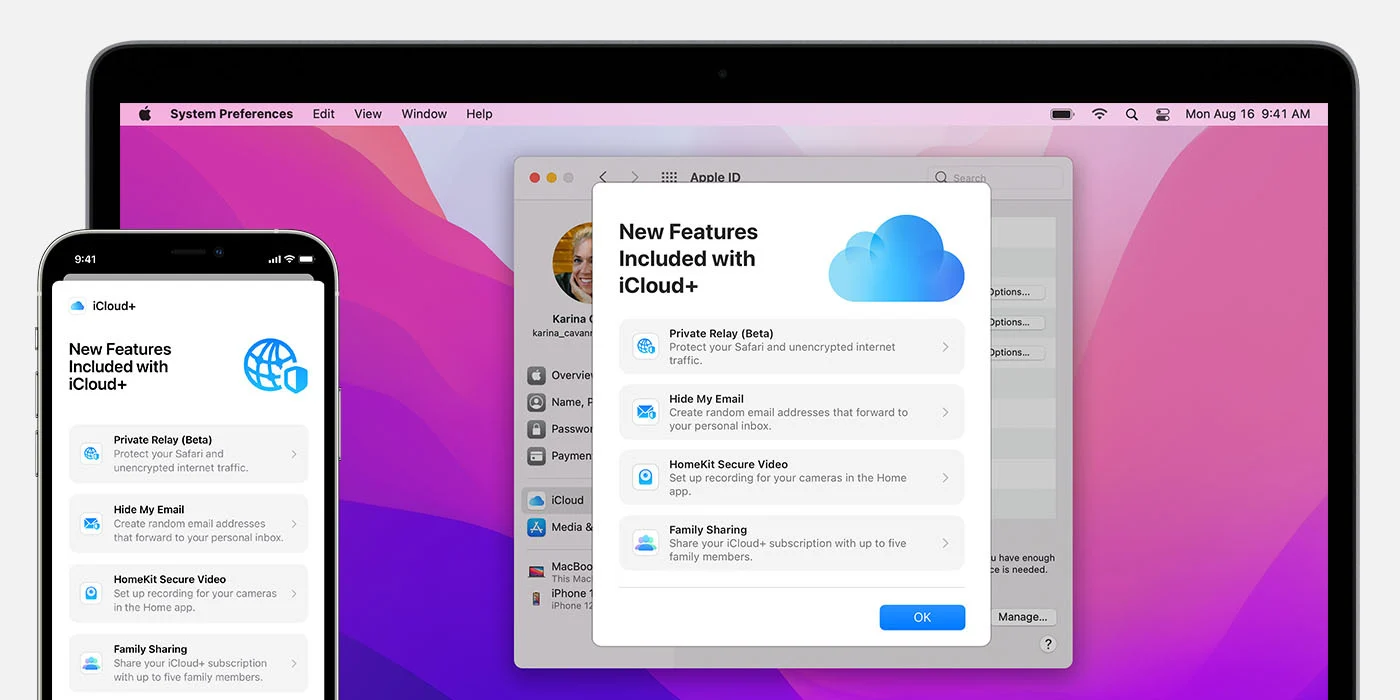
iCloud has been the foundation of Apple’s ecosystem for years, allowing for easy file sharing, synchronisation, and backup. But with the release of iOS/iPadOS 15, Apple introduced iCloud+, a cloud service that is now even better than before. With its special features like Private Relay, Hide My Email, Custom Email Domain, and enhanced HomeKit Secure Video capabilities, this premium membership is intended to improve security and privacy. Here is a summary of the features that iCloud+ offers.

Comprehending the iCloud Landscape:

What Is iCloud+? Apple's Cloud-Based Storage Service Explained

Image Source: pcmag.com

  • iCloud: Photo, email, contacts, calendars, and more are all covered by Apple’s basic file backup and synchronisation service. 5GB of internet storage is offered by the free version.
  • iCloud+: iOS 15 and iPadOS 15 users can subscribe to the premium plan, which offers 50GB, 200GB, and 2TB of storage. It comes with upgraded features that go beyond what the free plan offers.

Key features of iCloud+:

  • Private Relay: Apple’s creative VPN solution that protects your online activity while using Safari. It sends your traffic across two different relays for increased anonymity, substituting an anonymous IP address based on your area for your original one.
  • Hide My Email: An improved version of Apple Sign-in that minimises spam and maintains anonymity by enabling the use of a random email address for any website or online form.
  • Custom Email Domain: This feature allows you to send and receive iCloud Mail using your domain rather than an icloud.com address. It is designed for users who have their domain names. Up to five personal domains with three email addresses are supported.
  • HomeKit Secure Video Enhancements: Depending on your membership, iCloud+ provides a range of storage choices, including 50GB for one camera, 200GB for up to five cameras, and 2TB for an infinite number of cameras.

How to Use iCloud Services:

iCloud Drive: The location of your synced and backed-up files. Direct file uploading, downloading, and sharing are supported.

iCloud+ is available as a comprehensive bundle for all Apple products, including the iPhone, iPad, Apple Watch, Mac, and Apple TV. It also allows up to five family members to participate in family sharing.

Basically, iCloud+ is a whole digital experience improvement rather than just an upgrade in storage. With features like Custom Email Domain and Private Relay, Apple’s iCloud+ is a comprehensive suite that adapts to its users’ changing demands. It also offers personalised email solutions.

Is Your Printer Offline? Tips and Tricks to Connected it to Wi-Fi

Is Your Printer Offline? Tips and Tricks to Connected it to Wi-Fi

Experiencing an ‘offline’ status on your printer can be frustrating, especially when you need to print urgently. This article explains effective tricks to reconnect your printer to Wi-Fi and get it back online.

Understanding Printer Offline Status

Is Your Printer Offline? Tips and Tricks to Connected it to Wi-Fi

Image Source: pcmag.com

When your printer is offline, it is not able to communicate with your computer over a Wi-Fi network. This could be due to a variety of reasons ranging from network issues to outdated software.

Check Your Wi-Fi Connection

The first step is to ensure your Wi-Fi network is active and stable. Check other devices to confirm network functionality.

Restart Your Printer and Router

Often, simply restarting your printer and Wi-Fi router can resolve connectivity issues. This resets the network settings and may help you reconnect your printer.

Update Printer Drivers

Outdated printer drivers can prevent your printer from connecting to Wi-Fi. Updating these drivers can often resolve this issue.

Reconfigure the Wi-Fi Settings on the Printer

Sometimes, it is necessary to reconfigure your printer’s Wi-Fi settings. This involves resetting the network settings on your printer and connecting it to your Wi-Fi network again.

Check for IP Address Conflicts

Your printer may be offline due to an IP address conflict in your network. Resolving these conflicts can restore connectivity.

Use Static IP Address for Printer

Assigning a static IP address to your printer ensures it consistently connects to the same network address, improving stability.

Disable VPN Services Temporarily

Active VPN services may interfere with printer connectivity. Disabling them temporarily may help establish a stable connection.

Check Printer's Firmware

Outdated firmware can also cause connectivity issues. Update the firmware and install them if available.

Consider Using a Wired Connection

If Wi-Fi connectivity issues persist, consider using a wired connection for reliable printing.

When to Seek Professional Help

If these steps do not resolve the problem, it is time to seek professional technical support.

Maintaining Your Printer for the Future

Regular maintenance, such as software updates and network checks, can prevent future connectivity problems.

Conclusion

By following these steps, you can effectively troubleshoot and resolve Wi-Fi connectivity issues with your printer.