Your Tech Story

Tech Tips

WhatsApp Screen Sharing Made Easy: Follow These Simple Steps

WhatsApp Screen Sharing Made Easy: Follow These Simple Steps

Screen sharing has become an essential tool in our digital toolkit, especially in apps like WhatsApp. Whether it’s for work, guiding someone through an app, or sharing content, knowing how to share your phone screen on WhatsApp can enhance your communication experience.

What is WhatsApp Screen Sharing?

WhatsApp Screen Sharing Made Easy: Follow These Simple Steps

Image Source: cellularnews.com

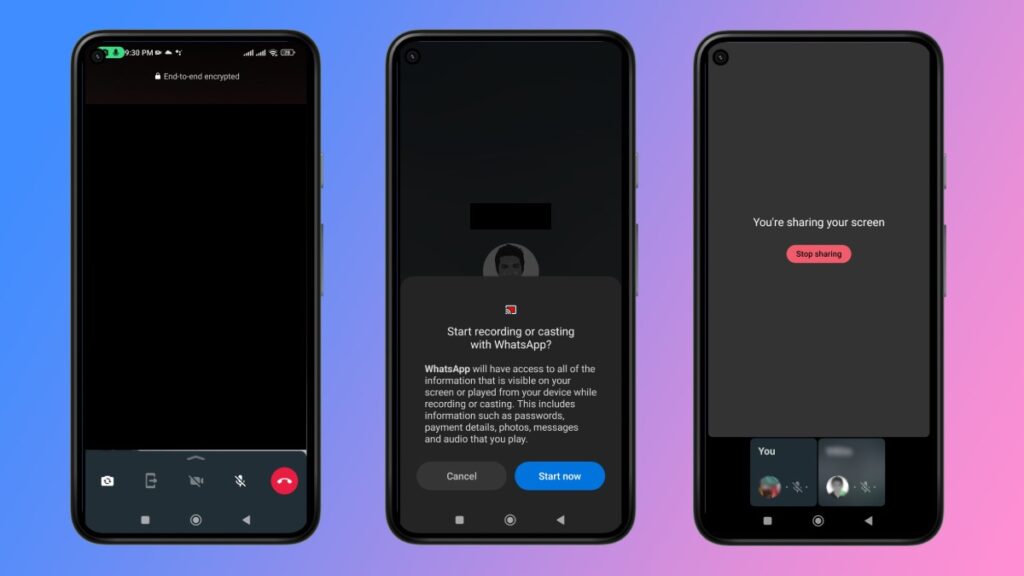
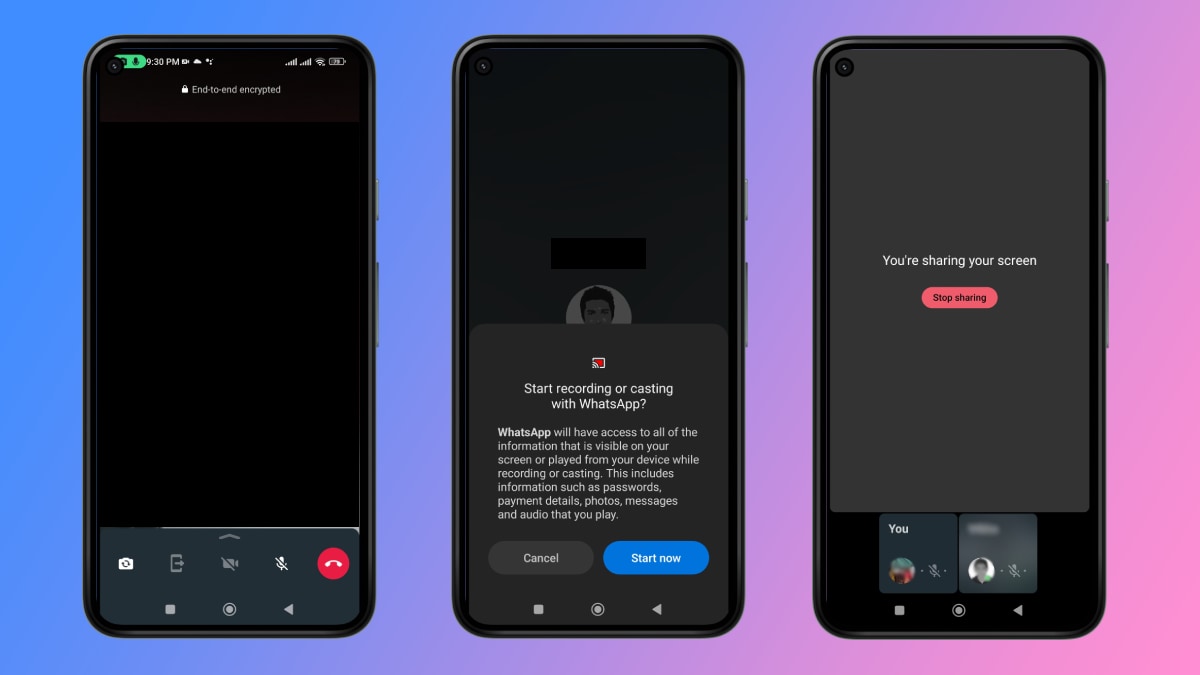
WhatsApp screen sharing is a feature that allows users to share the content of their phone’s screen in real-time during a voice or video call on the WhatsApp platform. It enables users to display apps, photos, documents, or any other content on their screen to the person they are communicating with, enhancing interaction and collaboration during WhatsApp calls.

Rumors have Surfaced After Musk’s Takeover

Screen sharing has become an essential tool in our digital toolkit, especially in apps like WhatsApp. Whether it’s for work, guiding someone through an app, or sharing content, knowing how to share your phone screen on WhatsApp can enhance your communication experience.

Step-by-Step Guide to Screen Sharing on WhatsApp

Sharing your screen on WhatsApp is a straightforward process that enhances your communication experience. Here’s a step-by-step guide on how to use the screen sharing feature on WhatsApp:

Update WhatsApp:

  • Make sure you have the latest version of WhatsApp.

Start a WhatsApp Call:

  • Open WhatsApp and go to the contact or group you want to share your screen with.

  • Start a voice or video call by tapping the call icon.

Activate Screen Sharing:

  • Once the call is connected, look for the screen-sharing icon. This icon usually looks like a monitor or a rectangular shape with an arrow.

  • Tap the screen sharing icon.

Grant Permission:

  • When you use this feature for the first time, WhatsApp may request permission to record your screen. Grant the necessary permissions.

Begin Sharing:

  • After granting permission, your phone screen will be visible to the person on the other end of the call.

  • Navigate through your phone as needed. The viewer will see everything displayed on your screen.

Stop Sharing:

  • To stop screen sharing, simply tap the screen sharing icon again or end the call.

  • Some versions of WhatsApp may show a stop button on your screen during sharing.

Ending the Call:

  • Once you’re finished sharing the screen, you can continue your call or end it by tapping the End Call button.

Remember, when you’re sharing your screen, everything that appears on your screen, including notifications, will be visible to the person on the other end. Make sure any sensitive or private information is hidden or notifications are turned off to maintain your privacy.

Troubleshooting Common Screen Sharing Issues

If you encounter issues like screen lag or disconnection, this section provides solutions to ensure smooth screen sharing.

Conclusion

Screen sharing on WhatsApp is a versatile and user-friendly feature that can enhance your communication and collaboration. By following these guidelines, you can get the most out of this functionality.

Samsung Galaxy S24 vs iPhone 15: A Comprehensive Comparison

Samsung Galaxy S24 vs iPhone 15: A Comprehensive Comparison

Samsung’s latest release, the Galaxy S24 lineup, is stirring up the smartphone market once again. Let’s delve into how these newcomers stack up against Apple’s iPhone 15 series.

Design Evolution: A Familiar Yet Refreshing Look

Samsung Galaxy S24 vs iPhone 15: A Comprehensive Comparison

Image Source: techradar.com

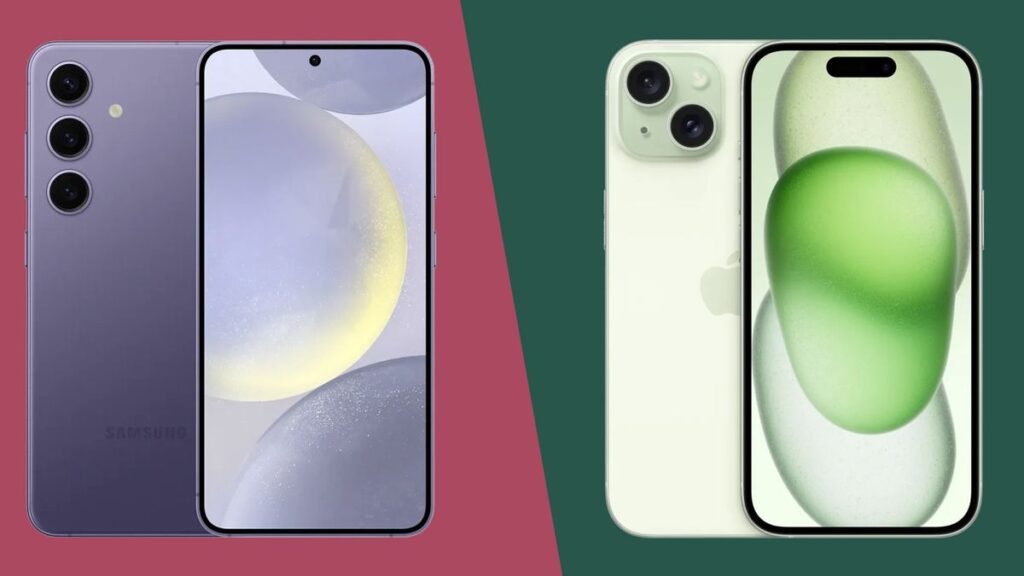
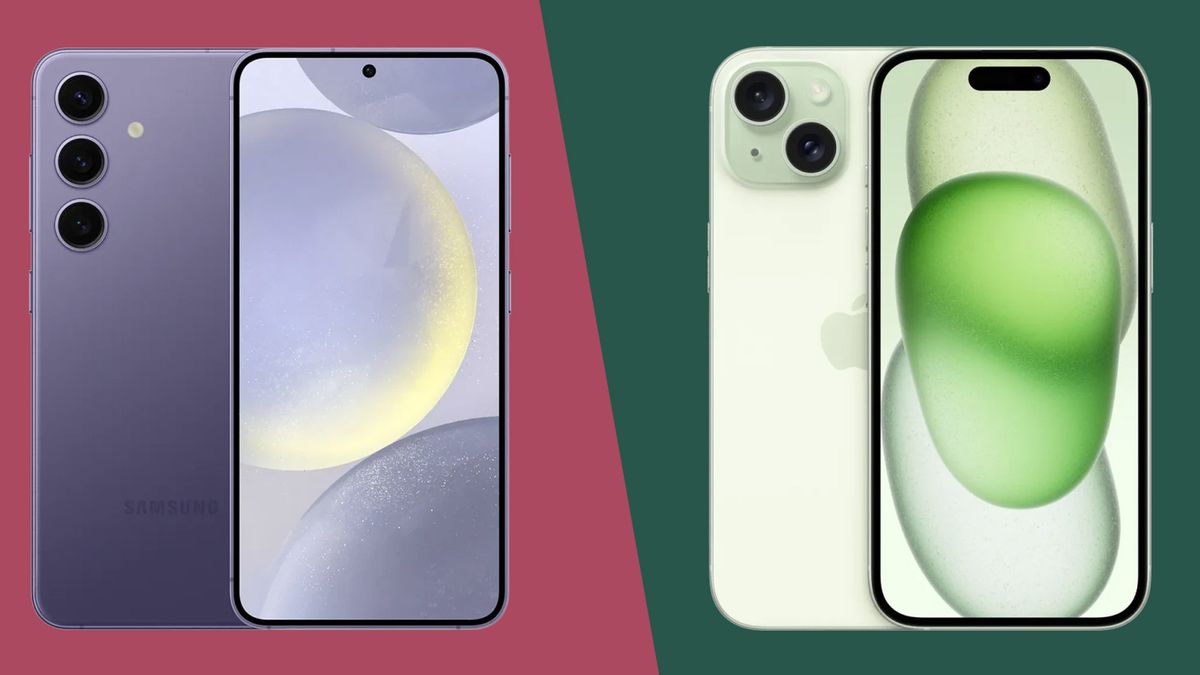
Samsung’s Galaxy S24 introduces a design refresh, embracing a sleek matte finish and flaunting flat edges, reminiscent of recent iPhone models. While the departure from curved edges might seem subtle, it marks a departure from Samsung’s previous design language, bringing it closer to Apple’s aesthetic.

Size Matters: From Big to Compact

The trend towards larger screens seems to have plateaued as Samsung scales down the Galaxy S24 to a more manageable 6.2-inch display. Despite the slight reduction, the Galaxy S24 maintains its allure, offering a vibrant 120Hz AMOLED panel, rivaling the iPhone 15’s display prowess.

Unveiling Galaxy AI: The Game-Changing Features

Samsung’s emphasis on artificial intelligence permeates the Galaxy S24 experience, introducing a suite of AI-powered functionalities. From Circle to Search, enabling swift Google searches with a simple gesture, to Transcript Assist, offering voice memo transcriptions and summaries, Samsung’s Galaxy AI aims to enhance user productivity and convenience.

Enhanced Photography: Pushing the Boundaries with AI

In the realm of photography, the Galaxy S24 leverages AI to elevate the photo-editing experience. Users can manipulate images with precision, seamlessly removing objects or adjusting compositions, all powered by Galaxy AI’s generative tools. Additionally, Live Translate and Chat Assist features cater to diverse communication needs, fostering seamless interactions across languages and platforms.

Camera Capabilities: A Battle of Pixels and Processing

Both Samsung and Apple leverage AI and advanced image processing to refine camera performance. While Samsung boasts a 50-megapixel sensor, Apple employs pixel-binning technology to optimize image quality. The results? A close competition, with each excelling in different shooting scenarios. Furthermore, the Galaxy S24’s 3x optical zoom and AI-enhanced digital zoom provide versatility, challenging the iPhone’s digital zoom capabilities.

Power and Performance: The Chip Conundrum

The Galaxy S24’s choice between the Exynos 2400 and Snapdragon 8 Gen 3 chips mirrors Apple’s integration of its A-series Bionic chips. Despite comparable benchmark scores, differences in power efficiency and heat management may sway user preferences. However, Samsung’s focus on battery optimization ensures sustained performance, promising enduring usage without compromising on power.

Beyond the Basics: Tailored Experiences and Ecosystem Integration

Samsung’s collaboration with Instagram underscores its commitment to app optimization, narrowing the user experience gap between Android and iOS. Moreover, features like Smart Share and Samsung DeX offer seamless integration with other devices and platforms, enhancing user convenience and productivity.

All the Specs:

GALAXY S24

  – Display: 6.2-inch 120Hz AMOLED

  – Processor: Exynos 2400 / Snapdragon 8 Gen 3

  – Camera: 50MP main, 12MP ultrawide, 12MP telephoto

  – Battery: ~4,000mAh

  – Weight: 167 grams

  – Operating System: Android 13 with One UI 5.1

iPHONE 15

  – Display: 6.1-inch Super Retina XDR OLED

  – Processor: A17 Bionic

  – Camera: 12MP main, 12MP ultrawide, 12MP telephoto

  – Weight: 171 grams

  – Operating System: iOS 16

In the showdown between the Galaxy S24 and iPhone 15, personal preference takes center stage. While Samsung’s offerings tout innovative features and competitive pricing, loyalists to the Apple ecosystem may find solace in the familiarity and seamless integration offered by the iPhone.

As Samsung’s Galaxy S24 lineup graces store shelves, consumers are faced with a tantalizing choice. Whether swayed by Samsung’s AI prowess or Apple’s ecosystem allure, one thing remains clear: the smartphone landscape continues to evolve, offering users an array of options tailored to their preferences and priorities.

Step-by-Step Guide to Resolve Error Code 0xc0000001 on Windows 10/11

Step-by-Step Guide to Resolve Error Code 0xc0000001 on Windows 10/11

Step-by-Step Guide to Resolve Error Code 0xc0000001 on Windows 10/11

One of the confusing error codes that Windows users may run across is ‘Error Code 0xc0000001,’ which is frequently linked to the Blue Screen of Death (BSOD). Even if these kinds of mistakes might cause delays in work, there are practical solutions to deal with and fix this specific problem on Windows 10 or 11. Several solutions to the ‘Error Code 0xc0000001’ are shown below:

1. Launch the Tool for Startup Repair:

  • Choose the Startup Repair tool when you boot into the Advanced Startup menu.

  • Give the tool permission to examine and fix any possible Windows problems.

  • Restart your computer when it’s finished to see whether the issue is still there.

2. Make use of the Command Prompt:

Click the Advanced options menu to bring up the Command Prompt. One by one, type the following commands, pressing Enter after each one:

  • Copy the Bootrec /fixmbr code.

  • Fixboot / Bootrec

  • Bootrec /rebuildbcd Bootrec /scanos

  • Try a fresh PC reboot to see if anything has improved.

3. Unplug Every External Gadget:

  • Cut off all peripherals and external devices.

  • Reattach them after a brief while.

  • Sometimes problems arise from external devices; try this quick fix to see if it fixes the problem.

4. Enter Safe Mode:

  • Enter Safe Mode, turn off any newly installed third-party programs, and find any problems.

  • Reboot normally after removing the troublesome program in Safe Mode

5. Run a Windows System Restore:

  • This may be used to restore your computer to a time when it was operating properly.

  • Refer to the System Restore handbook for instructions.

6. Conduct a Malware Scan:

  • Use Microsoft Defender or your chosen antivirus program to conduct a malware scan.

  • Several PC problems, including boot failures, can be caused by malware.

7. Use a CHKDSK Scan:

  • To identify and resolve any hard disc problems, use the CHKDSK tool.

  • Run the following command in Command Prompt: chkdsk /f /r.

8. Reset Windows to the Factory Defaults:

  • Consider doing a Windows factory reset as a final option.

  • Before moving on, make sure you have backups of all important data.

  • Resolving ‘Error Code 0xc0000001’ necessitates a methodical approach, experimenting with various fixes until the problem is fixed. 

Users ought to select the approach that most closely matches their technical proficiency and circumstances. Before carrying out any significant operations, such as a factory reset, don’t forget to back up important data. By following these instructions, users should be able to resolve the BSOD issue and get their Windows 10 or 11 PCs back in working order.

Keep in mind that every system is different, therefore these solutions’ efficacy could differ. It could be wise to seek expert help if the issue continues.

How to Start Streaming on Twitch: A Step-by-Step Guide

How to Start Streaming on Twitch: A Step-by-Step Guide

Are you ready to start your streaming journey on Twitch? Whether you’re a gaming enthusiast, a creative artist, or just someone with a story to tell, Twitch offers a platform to share your passions with the world. Let’s dive into how you can start streaming on Twitch with ease.

What is Twitch?

How to Start Streaming on Twitch: A Step-by-Step Guide

Image Source: dacast.com

Twitch is a popular live-streaming platform that has become the central hub of online entertainment, especially for gamers. It allows users to broadcast themselves playing video games, creating art, cooking, or engaging in various other activities while interacting with a live audience via chat. Originally focused on video game live streaming, Twitch has expanded to include streams dedicated to music, talk shows, and even TV series watch-alongs. The platform is known for its community-driven approach, enabling viewers to support their favorite streamers through subscriptions, donations, and interactive chat features. 

Create a Twitch Account

Creating a Twitch account is a straightforward process, allowing you to step into the world of live streaming and community interaction. Here’s how you can get started:

  • Go to Twitch.tv.

  • Click the “Sign Up” button, usually located at the top right corner of the page.

  • Fill in the required fields including username, password, date of birth, and email address.

  • Password: Use a strong password for security.

  • Check your email inbox and click the verification link to activate your account.

Essential Equipment for Streaming

To start streaming on Twitch, it is important to have the right equipment to ensure a smooth and engaging streaming experience. Here is a list of what you will need:

  1. Computer: A reliable and powerful computer is fundamental.

  2. High-Quality Webcam: A good webcam is important for visual interaction. This helps you personalize your stream and connect with your audience.

  3. Microphone: Audio clarity is essential. A high-quality microphone can significantly improve the audience experience.

  4. Headphones: Good headphones are important for monitoring audio and clear communication, especially in multiplayer games.

  5. Lighting: Proper lighting is important for visibility. Ring lights or softbox lights can help eliminate shadows and illuminate your face evenly.

  6. Internet Connection: A stable and fast internet connection is important for streaming. Wired connections (Ethernet) are generally more reliable than wireless connections.

  7. Streaming Software: Broadcasting your gameplay requires software like OBS Studio, Streamlabs OBS, or Xsplit.

  8. Green Screen (optional):Green screen can be used to overlay different backgrounds, making your stream more attractive.

Building Your Twitch Community

Building a Twitch community involves creating a welcoming and engaging environment where regular interactions and high-quality content encourage viewer participation and loyalty. Consistency in streaming, active engagement with the audience, and leveraging social media for promotion are key elements. Collaborating with other streamers and fostering a positive, inclusive environment also plays an important role in developing and maintaining a vibrant community on Twitch.

Monetizing Your Twitch Stream

Monetizing your Twitch stream involves taking advantage of various revenue streams such as viewer subscriptions, advertising, donations, and sponsorships. Twitch affiliates and partners can earn through subscriptions and Bits, while integrating external services like PayPal for direct donations. Engaging content and a dedicated audience base are key to attracting sponsorship and advertising revenue, with monetization becoming a mix of consistent streaming, community building, and strategic marketing.

Conclusion

In Conclusion, streaming on Twitch is an exciting venture that blends creativity, community engagement, and technical know-how. With the right equipment, a consistent streaming schedule, and a focus on creating engaging content, anyone can embark on this rewarding journey. Building a community and potentially monetizing your channel are achievable goals, making Twitch streaming a gratifying experience for both hobbyists and aspiring professionals.

Step-by-Step Guide to Sharing Instagram Posts, Reels, and Stories with Close Friends

Step-by-Step Guide to Sharing Instagram Posts, Reels, and Stories with Close Friends

Instagram’s close friends feature provides a unique way to share content with a select group of people, enhancing privacy and personalization. In this comprehensive guide, we’ll explore how to effectively use this feature for posts, reels, and stories.

The Concept of Close Friends on Instagram

Step-by-Step Guide to Sharing Instagram Posts, Reels, and Stories with Close Friends

Image Source: hypebeast.com

Explore the concept of Close Friends on Instagram, a feature that allows you to create a private list for sharing exclusive content with a select group, enhancing both privacy and personal connections on the social platform.

How to Add or Remove People from 'Close Friends'

  • Go to your Profile.

  • Tap on the top right

  • After this click on Close Friends.

  • Click on ‘Empty Circle‘ next to the people you want to add to your Close Friends list.

  • To remove someone from your list, click on the ‘Filled Circle‘ next to their name.

  • Click Done to save your changes.

They won’t be notified when you add or remove people from your list. You can update your list at any time.

Sharing Posts and Reels with Close Friends

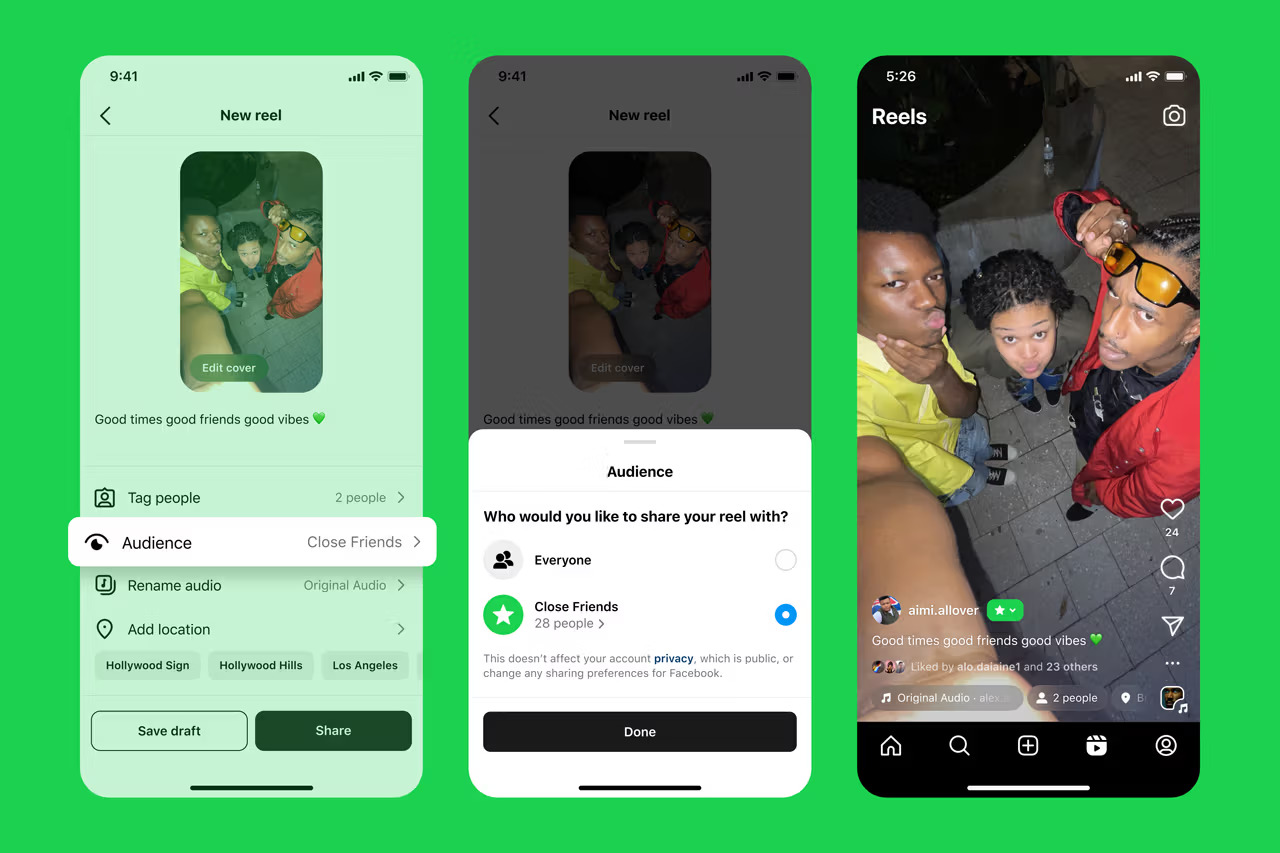
  • Create a post as usual.

  • Click Next when you are finished editing.

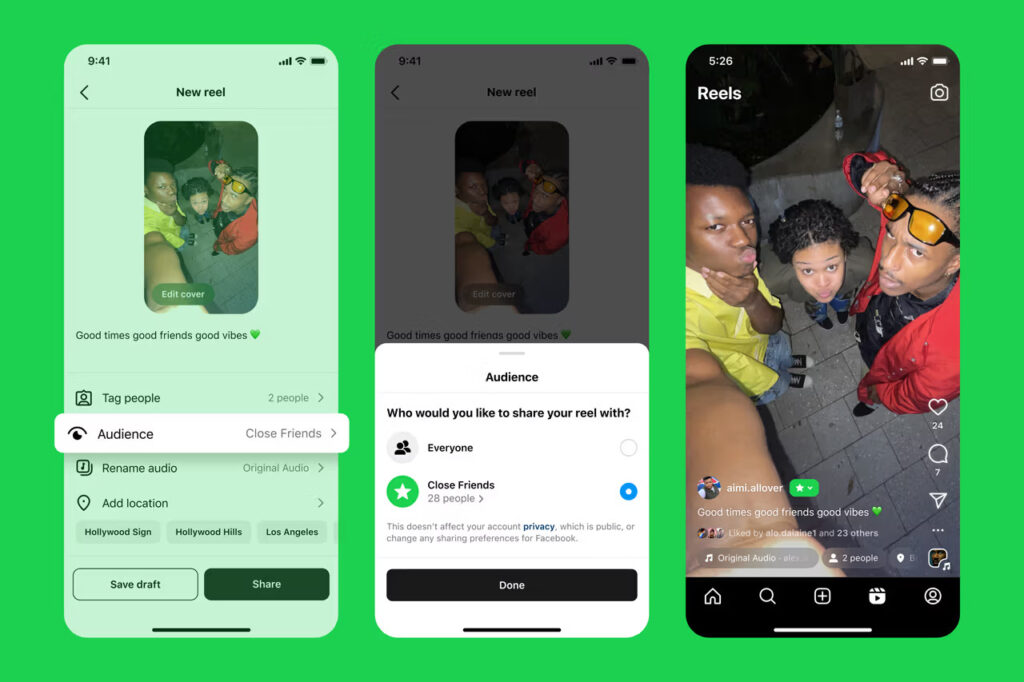
  • Click on Audience.

  • Select Close Friends, then click Done.

  • After this tap on Share.

If you’ve added someone to your list, they’ll see a close friend label when viewing your Reela and Posts.

Sharing Stories with Close Friends

  • Create a Story.

  • Select the Close Friends Green Star Icon when you are finished editing.

  • After this tap on Share.

Benefits of Using the Close Friends Feature

The benefits of Instagram’s Close Friends feature, which offers enhanced privacy and a more intimate sharing experience with a select group, fosters deeper, more personal connections.

Comparing Close Friends with Public Sharing

Close Friends provides a private, intimate sharing experience with a selected group, while Public Sharing exposes content to a broader audience, making privacy, engagement, and content strategy easier. She goes. Is affected.

Conclusion

The Close Friends feature on Instagram offers a unique way to share content with a select group of people. It is an excellent tool for maintaining privacy while staying connected with your closest connections on the platform.

How to Reset Any Amazon Alexa Device: A Quick and Easy Guide

How to Reset Any Amazon Alexa Device: A Quick and Easy Guide

Resetting an Alexa device may seem daunting, but it’s a straightforward process that can solve many problems. This guide will walk you through the steps to reset different Alexa models, including the Echo Dot, Echo Show, and Echo Studio.

Understanding Why You Might Need to Reset

How to Reset Any Amazon Alexa Device: A Quick and Easy Guide

Image Source: smarthomeperfected.com

There are many reasons to reset your Alexa device. It may be unresponsive, you may be planning to sell it, or you may just want a fresh start. Before resetting, make sure your device is plugged in and connected to the Internet.

Each model has its own reset procedure. We’ll cover the Echo Dot, Echo Show, and Echo Studio.

Step-by-Step Guide to Resetting Echo Dot

  • Locate the reset button.

  • Press and hold the button until the light turns orange.

  • Follow the prompts to complete the reset.

Instructions for Resetting Echo Show

  • Swipe down from the top of the screen.

  • Access the settings menu.

  • Select ‘Device Options’, then ‘Reset’.

How to Reset Echo Studio

  • Click and hold the microphone off and volume down buttons.

  • Wait for the light ring to turn off and then on again.

  • Release the buttons to initiate reset.

Reconfiguring Your Device After Reset

You need to set up your device as if it was new. This includes connecting to Wi-Fi and logging into your Amazon account.

Conclusion

Resetting your Amazon Alexa device is a straightforward process that can solve a variety of problems and refresh your device’s functionality. Whether you have an Echo Dot, Echo Show, or any other Alexa gadget. Remember, resetting your device will erase all custom settings and data, so it should be done carefully. With the steps outlined in this guide, you are now ready to confidently reset your Alexa device, ensuring that it will continue to be a valuable and efficient part of your smart home setup.

FAQs

  1. Will resetting my Alexa device delete all my data

    Yes, a reset will erase all your settings and data.

  2. Can I reset my Alexa device remotely?

    No, you need physical access to the device to reset it.

  3. How often should I reset my Alexa device?

    Only reset when necessary, such as when experiencing problems.

  4. Will resetting affect my smart home devices?

    Yes, you’ll need to reintegrate your smart home devices after a reset.

  5. Can I undo a reset?

    No, once a reset is done, it cannot be undone.