Your Tech Story

Tech Tips

How to Easily Disable AdBlock in Safari on iPhone, iPad, and Mac

How to Easily Disable AdBlock in Safari on iPhone, iPad, and Mac

In today’s digital age, ad blockers like Adblock have become essential tools to enhance our browsing experience, offering us with a way to navigate the web without intrusive advertisements. However, there are instances where you may need to disable Adblock in Safari, whether to support a favorite website through ad revenue or to ensure full functionality on sites hindered by ad blocking. This guide provides a comprehensive walkthrough on how to turn off AdBlock on Safari on iPhone, iPad, and Mac devices.

Understanding AdBlock

How to Easily Disable AdBlock in Safari on iPhone, iPad, and Mac

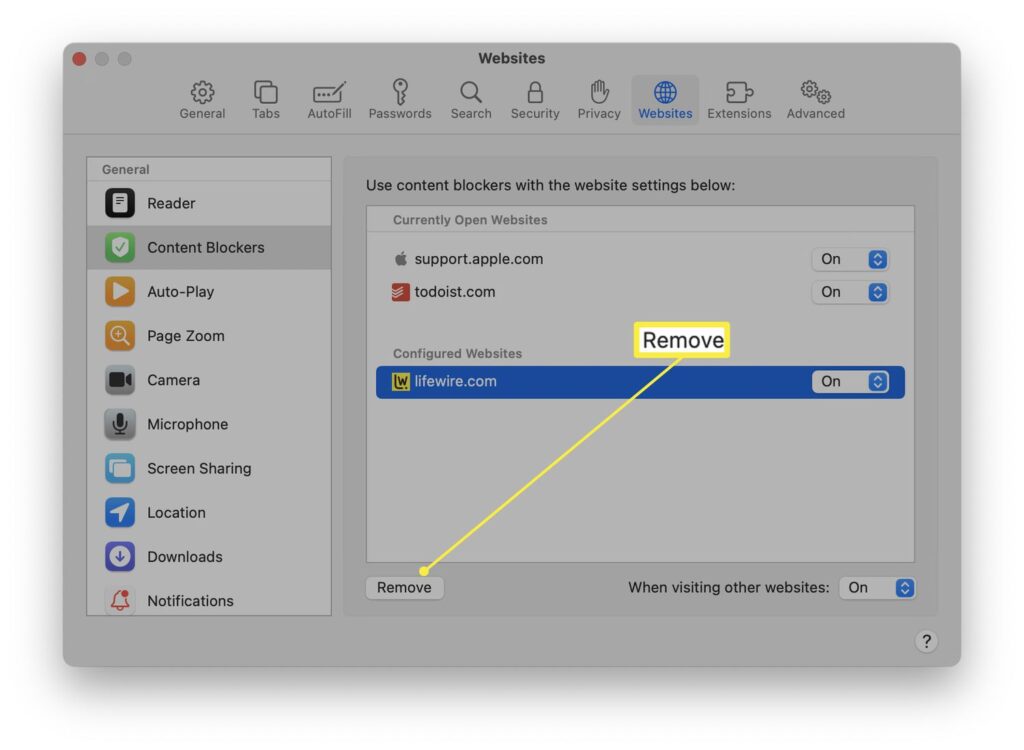
Image Source: lifewire.com

Adblock is a popular extension for web browsers that filters content and blocks advertisements on web pages. Although it provides a cleaner and faster browsing experience, temporarily disabling it can help support websites that rely on advertising revenue or when its filtering interferes with the site’s functionality.

Disabling AdBlock on iPhone and iPad

To disable AdBlock on your iPhone or iPad, follow these steps:

  1. Open Settings: Open the “Settings” app on your Apple Device.

  2. Scroll to Safari: Navigate through the menu options until you find “Safari” and tap on it.

  3. Tap on Content Blockers: Look for the “Content Blockers” option within Safari Settings and select it.

  4. Toggle Off AdBlock: Find Adblock in the list of content blockers and toggle the switch to the Off position to disable it.

  5. Exit Settings: After disabling Adblock, you can exit the Settings app. Changes will take effect immediately in Safari.

Remember, these steps may differ slightly depending on the version of iOS or iPadOS you’re using and whether you installed AdBlock as an app or a Safari extension.

Disabling AdBlock on Mac

Disabling AdBlock on a Mac can be done directly within Safari or through System Preferences. Here’s how:

  1. Open Safari: Launching the Safari browser on your Mac.

  2. Access Preferences: Click on “Safari” in the menu bar, then select “Preferences” from the dropdown menu.

  3. Go to Extensions: In the Preferences window, click on the “Extensions” tab to view all installed extensions.

  4. Find AdBlock: Look through the list of extensions until you find AdBlock.

  5. Disable AdBlock: Uncheck the box next to AdBlock to disable it. If you wish to remove it completely, select AdBlock and click the “Uninstall” button.

  6. Close Preferences: Once you’ve disabled or uninstalled AdBlock, you can close the Preferences window. Refresh any open web pages to see if the changes take effect.

Conclusion

Disabling AdBlock in Safari on your iPhone, iPad, or Mac is a straightforward process that can be easily reversed. Whether you’re doing it to support a website or troubleshoot problems, knowing how to manage your ad-blocking preferences helps maintain a balance between a seamless browsing experience and supporting online content creators.
The Ultimate Guide to Choosing the Perfect Gaming Laptop

The Ultimate Guide to Choosing the Perfect Gaming Laptop

The Ultimate Guide to Choosing the Perfect Gaming Laptop

Choosing the right gaming laptop can be as important to your success as choosing the right armor or weapon in a game. With the vast range of options available, identifying the ideal machine that balances power, performance, and portability requires understanding the key features that impact your gaming experience. This article explores the essential aspects to consider when looking for a gaming laptop, ensuring that you make an informed decision that enhances your virtual adventures.

Performance: The Heart of Gaming

CPU Power

A strong central processing unit (CPU) is important for gaming. Look for recent generation Intel i7 or i9 processors, or their AMD Ryzen counterparts to handle complex game mechanics smoothly.

Graphics Prowess

The graphics processing unit (GPU) is your gaming lifeline. NVIDIA’s GeForce RTX series and AMD’s Radeon RX series are top choices, providing powerful performance to render your games in stunning detail.

RAM Requirements

Adequate random access memory (RAM) ensures that your games and background applications run without interruption. Aim for at least 16GB of RAM, although 32GB may provide a more future-proof solution.

Immersive Display: See Every Detail

Screen Size & Resolution

While larger screens provide an immersive experience, they can add bulk. The 15-inch display with a 1920×1080 resolution strikes a good balance as a solid baseline. For sharper images, consider a QHD (2560×1440) or 4K (3840×2160) display.

Refresh Rate

A high refresh rate is the key to a smooth visual experience. 144Hz is becoming increasingly common and provides smooth gameplay, but 240Hz panels provide even better speeds for fast-paced games.

Storage: Quick Access to Your Arsenal

SSD vs. HDD

Solid state drives (SSD) provide faster boot and load times than hard disk drives (HDD), making them the preferred choice for gamers. Opt for at least a 512GB SSD, or consider a smaller SSD for your operating system and games, complemented by a larger HDD for additional storage.

Design and Build: Durability Meets Style

Robust Build

A sturdy chassis can withstand the rigors of travel and intense gaming sessions. Metal casings provide durability, while some high-quality plastics can provide flexibility without the added weight.

Cooling System

Effective cooling prevents overheating during long gaming marathons. Look for a laptop with an advanced cooling system, with multiple fans and dedicated heat pipes.

Keyboard and Controls: Your Command Center

Responsive Keyboard

A keyboard with good key travel and tactile feedback can increase your gaming precision. Backlit keyboards not only look great but also help you play games in low-light conditions.

Customizable Controls

Programmable keys or macros can give you an edge over the competition, allowing you to execute complex commands with ease.

Connectivity: Stay in the Game

Ensure your laptop has enough ports for your peripherals, including USB, HDMI, and Ethernet. Thunderbolt 3 or USB-C ports provide fast data transfer and connectivity options.

Battery Life: Play Without Limits

While gaming laptops aren’t known for their battery life, choosing a model that offers at least a few hours of playtime can be beneficial for those times when you’re away from a power outlet.

Conclusion

Choosing a gaming laptop is a balance between power and portability, display quality, and price. By prioritizing the features most important to your gaming style and needs, you can find a laptop that offers the best gaming experience within your budget. Remember, the right gaming laptop not only enhances your gameplay but also serves as a portal to new worlds, adventures and conquests.

How to Set a Sleep Timer on Amazon Music

How to Set a Sleep Timer on Amazon Music

Setting a sleep timer on Amazon Music can enhance your listening experience by automatically pausing music when you go to sleep. This feature is especially useful for people who enjoy sleeping to their favorite tunes but don’t want the music to keep playing all night. Here’s a step-by-step guide on how to set a sleep timer on Amazon Music, ensuring a peaceful and energy-efficient end to your day.

Why Use a Sleep Timer?

How to Set a Sleep Timer on Amazon Music
  • Save battery life on your mobile device or energy on your smart speaker.

  • Prevent music from playing all night, which can disrupt sleep cycles.

  • Fall asleep to your favorite songs without worrying about turning off the music manually.

Currently, Amazon Music does not have a built-in sleep timer feature within the app. However, you can use the sleep timer functionalities of your smartphone or through voice commands on smart speakers like Amazon Echo.

Step-by-Step Guide to Setting Up a Sleep Timer

  • Android: Use the built-in clock app’s timer feature. Set the timer for your desired duration, then select “Stop playing” as the action to be done at the end of the timer. This will stop the music when the timer runs out.

  • iOS: Similar to Android, use the Clock app, go to the Timer tab, set your desired time, tap on “When Timer Ends,” scroll down and select “Stop Playing,” then start your timer.

  • Speaker Users: If you’re using an Amazon Echo device, you can set a sleep timer with a voice command. Simply say, “Alexa, set a sleep timer for [duration].” Alexa will confirm that the sleep timer has been set and will stop playing music when the time is up.

Conclusion

While Amazon doesn’t offer a sleep timer feature directly within the Music app, a straightforward solution is to use the sleep timer functionality of your smartphone or smart speaker. This feature is invaluable for those who enjoy relaxing music while sleeping but don’t like to keep it playing all night long.

FAQs

  1. Can I set a sleep timer directly in the Amazon Music app?

    • No, Amazon Music does not currently offer a sleep timer feature within the app. However, you can use your device’s built-in functionalities or voice commands on smart speakers.

  2. Will using a sleep timer stop playback on all devices?

    • The sleep timer will only affect the device on which it is set. If you’re streaming music on multiple devices, you’ll need to set a timer on each one individually.

  3. Can I use the sleep timer with any Amazon Music subscription?

    • Yes, the sleep timer functionality, through device settings or voice commands, works regardless of your Amazon Music subscription type.

  4. Is it possible to extend the sleep timer if I’m not yet asleep when it ends?

    • Yes, you can extend the sleep timer by setting a new timer on your device or asking your smart speaker to set a new sleep timer.

  5. Does the sleep timer feature work with other music streaming apps?

    • Yes, using your device’s built-in timer or smart speaker voice commands for a sleep timer should work with most music streaming apps, not just Amazon Music.

A Complete Guide to Google Gemini AI on Android and iPhone

A Complete Guide to Google Gemini AI on Android and iPhone

Google’s Gemini app, an AI-powered chatbot, has recently undergone a significant expansion, making it accessible to users across 150 countries and territories, including India. With its innovative features and diverse language support, Gemini aims to revolutionize AI-driven conversations on both Android and iPhone platforms.

Global Accessibility: Breaking Boundaries

A Complete Guide to Google Gemini AI on Android and iPhone

The Gemini app, initially launched for Android users on February 8, has quickly captured attention for its groundbreaking capabilities. Its recent expansion to over 150 countries underscores Google’s commitment to democratizing AI-driven interactions on a global scale. By offering support in English, Korean, and Japanese languages, Gemini ensures inclusivity across diverse user demographics.

Embracing Diversity: Language Support and Accessibility

One of Gemini’s standout features is its multilingual support, catering to users from various linguistic backgrounds. Whether communicating in English, Korean, or Japanese, users can seamlessly engage with the chatbot, enhancing their digital experiences irrespective of language barriers.

Bridging the Gap: Gemini on iOS

While there isn’t a dedicated Gemini app for iOS, iPhone users can still leverage its capabilities through integration with the Google app. By simply toggling a feature within the Google app, iPhone users gain access to Gemini’s AI-driven conversations, expanding the reach of this innovative technology to a broader audience.

System Requirements: Ensuring Optimal Performance

To fully utilize the Gemini app on Android, users need devices with a minimum of 4GB RAM and running on Android 12 or later versions. Similarly, iPhone users must have iOS 16 or newer to activate the Gemini feature within the Google app. These system requirements ensure smooth functionality and optimal performance, guaranteeing a seamless user experience.

User Experience: Addressing Concerns and Enhancements

Jack Krawczyk, Senior Director of Product at Google overseeing Gemini, has been responsive to user feedback and concerns. By relaxing restrictions on image uploading and generation, Google aims to enhance user experience while maintaining responsible content alignment. Moreover, efforts to improve communication regarding Gemini’s capabilities vis-à-vis Google Assistant demonstrate a commitment to transparency and user satisfaction.

As Gemini’s global rollout continues, users worldwide can look forward to integrating this AI-powered chatbot into their digital routines, unlocking a new era of intelligent interactions on both Android and iPhone devices. With its expanding reach and continuous improvements, Gemini is poised to redefine the way we engage with AI technology, enriching our daily lives with seamless, personalized experiences.

How to Transform an Old Smartphone into a Security Camera

How to Transform an Old Smartphone into a Security Camera

How to Transform an Old Smartphone into a Security Camera

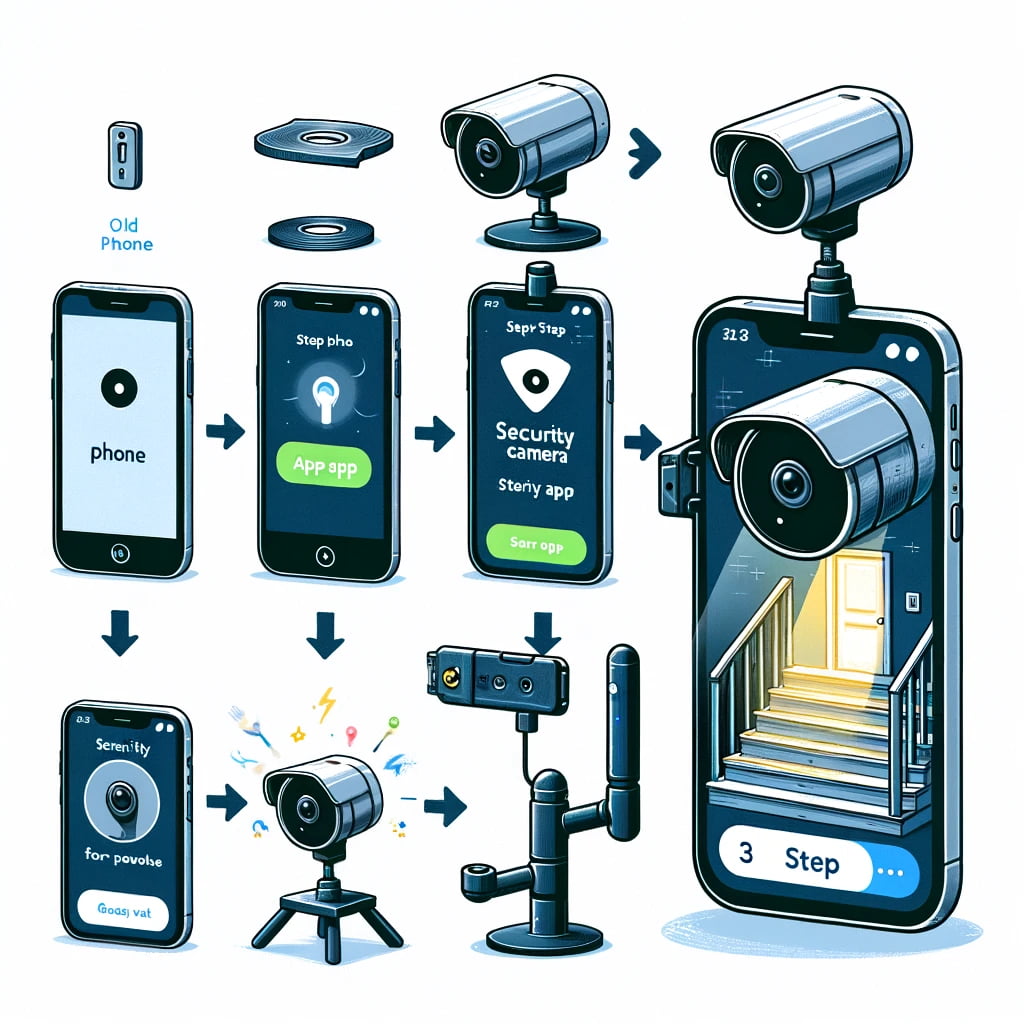
It’s time to make use of those outdated smartphones that are collecting dust in a drawer. Rather than just letting them sit there, think about using some of the many useful apps available for iOS and Android devices to transform them into a temporary surveillance camera. We’ll walk you through turning your old phone into a security camera in this post so you can monitor your house while you’re gone.

Selecting the Proper App

Your outdated smartphone may become a security camera with a variety of programs, each with unique features and functionalities. Here are some good options to think about:

Alfred: If you want to turn your old phone into a security camera, Alfred is a great option because it has features like two-way communication, motion detection, and live streaming. It even has a “trust circle” function that lets pals use the camera when necessary.

AtHome Camera: AtHome has capabilities including two-way communication, night vision, and artificial intelligence that can identify moving objects. Additionally, for fast observation, it features a 24-hour time-lapse mode.

Manything: You may use the free iOS app Manything to convert your iPhone or iPad into a security camera that is connected to Wi-Fi. It has capabilities like IFTTT connectivity with other smart home devices and motion detection.

Dormi: With the help of the Android software Dormi, you can use any Android device as a security camera or baby monitor. It has functions like remote monitoring from your primary phone and automated warnings.

Cloud Baby Monitor: It is a multipurpose program that can be used as a home security camera and a baby monitor. It provides remote monitoring through iOS devices and Mac PCs, motion detection, and high-quality video streaming.

Configuring Your Safety Camera

It’s time to configure your security camera after selecting the ideal app for your requirements. To set up your old smartphone as a camera, install the app and follow the prompts. After everything is set up, you may use a mounting system to put your old phone in the perfect spot or hold it up on a sturdy surface.

Keep an Eye on Your House

Now that your security camera is installed, you may use your primary smartphone or tablet to remotely watch your house. Utilising features like two-way communication, motion detection warnings, and live streaming, the majority of apps let you monitor your house and interact with people nearby.

Conclusion

One inexpensive approach to maintain the safety and security of your house is to turn your old smartphone into a security camera. You may revitalise your outdated electronics and feel secure knowing that your house is safe with the aid of these helpful apps, without going over budget.

 
How To Stop Contact Sharing On iPhone iOS 17

How To Stop Contact Sharing On iPhone iOS 17

In an era where data privacy is more important than ever, it is essential to understand how to manage your personal information on devices like the iPhone. iOS 17 introduces various features to enhance user experience and privacy controls, including the ability to manage contact sharing. This guide will walk you through the steps to turn off contact sharing on your iPhone, ensuring that your data will remain private and secure.

Understanding Contact Sharing on iOS 17

What is Contact Sharing?

How To Stop Contact Sharing On iPhone iOS 17

Image Source: beebom.com

Contact sharing on iOS 17 allows users to seamlessly share their contact information with other iOS devices. The feature is designed to facilitate an easy exchange of information, but raises privacy concerns for many.

How Does It Work?

The feature uses Apple’s ecosystem to sync contact information across devices owned by the user or shared with family and friends. While convenient, this can inadvertently lead to over-sharing of personal data.

The Importance of Managing Contact Sharing

Privacy Concerns

With the increasing risk of data breaches, managing who has access to your contact information is important. Turning off contact sharing can be a proactive step toward protecting your privacy.

Data Management

Controlling contact sharing helps manage your digital footprint, ensuring that only intended recipients have access to your contact details.

Step-by-Step Guide to Turn Off Contact Sharing

  1. Open the ‘Settings’ app on your iPhone.

  2. Scroll down and select ‘Contacts’.

  3. Tap on ‘Share My Contact Info’.

  4. Toggle the switch to ‘Off’ to disable contact sharing.

Ensure the changes are saved before exiting Settings. Your contact information will no longer be shared automatically.

Troubleshooting Common Issues

If you encounter any issues, restarting your device or checking for iOS updates may help resolve the issue. Turning off contact sharing may impact convenience but significantly increases privacy and security.

Conclusion

Controlling contact sharing on your iPhone is an important aspect of managing your privacy and security in the digital age. iOS 17 provides tools to customize these settings, ensuring users can take advantage of connectivity without compromising their personal information. Remember, taking charge of your digital footprint is not only about protecting your data, but also protecting your peace of mind.