Your Tech Story

how to

How to Use Apple's Stolen Device Protection on iOS 17.3

How to Use Apple’s Stolen Device Protection on iOS 17.3

In today’s digital age, safeguarding our devices and personal data is paramount. With the advent of iOS 17.3, Apple has introduced a robust feature called Stolen Device Protection, designed to thwart unauthorized access to your iPhone in the unfortunate event of theft. This article will guide you through the process of activating and utilizing this invaluable security measure.

Understanding Stolen Device Protection
How to Use Apple's Stolen Device Protection on iOS 17.3

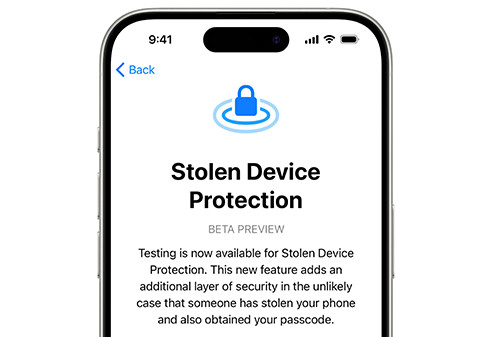
Stolen Device Protection serves as a shield against unauthorized access to your iPhone, particularly when someone has stolen it and possesses knowledge of your passcode. This feature becomes particularly crucial when you find yourself in unfamiliar surroundings, away from the safety of your home or workplace. By implementing Stolen Device Protection, crucial device and Apple ID account operations such as altering your device passcode or Apple ID password become inaccessible to unauthorized individuals without biometric authentication via Face ID or Touch ID, with no passcode fallback option.

Activating Stolen Device Protection

Activating Stolen Device Protection is a straightforward process:

  • Access Settings: Navigate to the Settings app on your iPhone.
  • Set Up Biometric Authentication: Depending on your iPhone model, either tap on “Face ID & Passcode” or “Touch ID & Passcode” and enter your passcode when prompted.
  • Enable Stolen Device Protection: Scroll down to locate the “Stolen Device Protection” section within the settings menu and tap on “Turn On Protection.”

Note: If you don’t immediately see the Stolen Device Protection section, ensure that you’ve set up Face ID or Touch ID on your device beforehand.

Utilizing Stolen Device Protection

Once activated, Stolen Device Protection fortifies your device against unauthorized access. However, it’s crucial to understand how to navigate this feature effectively:

Security Delay: Certain sensitive operations trigger a Security Delay, which requires a successful biometric authentication (Face ID or Touch ID), followed by an hour-long waiting period, and then another successful biometric authentication. This delay mechanism acts as an additional layer of defense, preventing unauthorized individuals from making changes that could compromise your device or Apple ID account. 

Activation of Lost Mode: In the event of theft or loss, Stolen Device Protection provides you with crucial time to activate Lost Mode using the Find My app or Find Devices feature on iCloud.com. This feature helps track and secure your device remotely, mitigating potential data breaches or misuse.

Deactivating Stolen Device Protection

Should the need arise to deactivate Stolen Device Protection, follow these steps:

  • Access Settings: Open the Settings app on your iPhone.
  • Biometric Authentication: Tap on either “Face ID & Passcode” or “Touch ID & Passcode” and enter your passcode as prompted.
  • Disable Stolen Device Protection: Scroll down to the “Stolen Device Protection” section and tap on “Turn Off Protection.”
  • Security Delay: If you’re not in a familiar location, initiating the deactivation process will prompt a Security Delay. Simply tap on “Start Security Delay” and follow the on-screen instructions to proceed.

By adhering to these steps, you can effectively activate, utilize, and deactivate Stolen Device Protection, bolstering the security of your iPhone and safeguarding your sensitive data against unauthorized access.

In conclusion, Stolen Device Protection emerges as a crucial security feature within iOS 17.3, offering users peace of mind and robust protection against the threat of device theft or unauthorized access. By leveraging biometric authentication and implementing Security Delays, Apple empowers users to take proactive measures in safeguarding their digital assets. So, ensure you activate Stolen Device Protection on your iPhone today and stay one step ahead in protecting your personal information.

Step-by-Step Guide to Sharing Instagram Posts, Reels, and Stories with Close Friends

Step-by-Step Guide to Sharing Instagram Posts, Reels, and Stories with Close Friends

Instagram’s close friends feature provides a unique way to share content with a select group of people, enhancing privacy and personalization. In this comprehensive guide, we’ll explore how to effectively use this feature for posts, reels, and stories.

The Concept of Close Friends on Instagram

Step-by-Step Guide to Sharing Instagram Posts, Reels, and Stories with Close Friends

Image Source: hypebeast.com

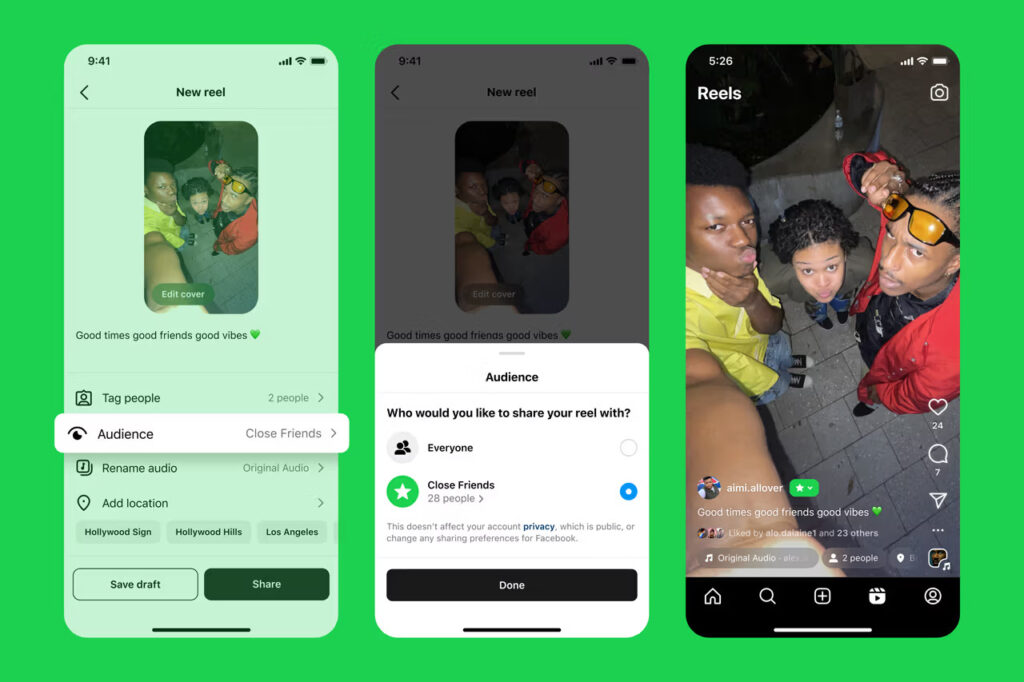
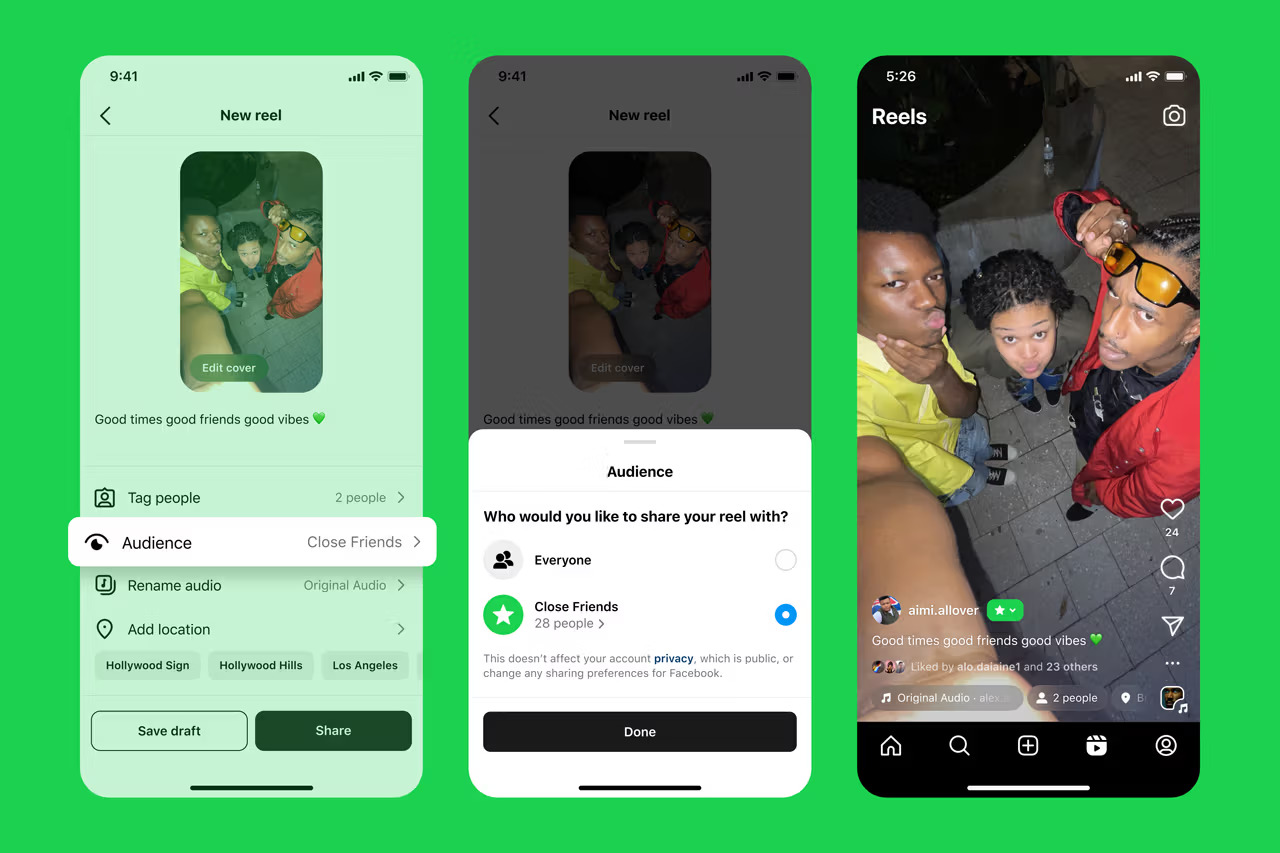
Explore the concept of Close Friends on Instagram, a feature that allows you to create a private list for sharing exclusive content with a select group, enhancing both privacy and personal connections on the social platform.

How to Add or Remove People from 'Close Friends'

  • Go to your Profile.

  • Tap on the top right

  • After this click on Close Friends.

  • Click on ‘Empty Circle‘ next to the people you want to add to your Close Friends list.

  • To remove someone from your list, click on the ‘Filled Circle‘ next to their name.

  • Click Done to save your changes.

They won’t be notified when you add or remove people from your list. You can update your list at any time.

Sharing Posts and Reels with Close Friends

  • Create a post as usual.

  • Click Next when you are finished editing.

  • Click on Audience.

  • Select Close Friends, then click Done.

  • After this tap on Share.

If you’ve added someone to your list, they’ll see a close friend label when viewing your Reela and Posts.

Sharing Stories with Close Friends

  • Create a Story.

  • Select the Close Friends Green Star Icon when you are finished editing.

  • After this tap on Share.

Benefits of Using the Close Friends Feature

The benefits of Instagram’s Close Friends feature, which offers enhanced privacy and a more intimate sharing experience with a select group, fosters deeper, more personal connections.

Comparing Close Friends with Public Sharing

Close Friends provides a private, intimate sharing experience with a selected group, while Public Sharing exposes content to a broader audience, making privacy, engagement, and content strategy easier. She goes. Is affected.

Conclusion

The Close Friends feature on Instagram offers a unique way to share content with a select group of people. It is an excellent tool for maintaining privacy while staying connected with your closest connections on the platform.

How to Reset Any Amazon Alexa Device: A Quick and Easy Guide

How to Reset Any Amazon Alexa Device: A Quick and Easy Guide

Resetting an Alexa device may seem daunting, but it’s a straightforward process that can solve many problems. This guide will walk you through the steps to reset different Alexa models, including the Echo Dot, Echo Show, and Echo Studio.

Understanding Why You Might Need to Reset

How to Reset Any Amazon Alexa Device: A Quick and Easy Guide

Image Source: smarthomeperfected.com

There are many reasons to reset your Alexa device. It may be unresponsive, you may be planning to sell it, or you may just want a fresh start. Before resetting, make sure your device is plugged in and connected to the Internet.

Each model has its own reset procedure. We’ll cover the Echo Dot, Echo Show, and Echo Studio.

Step-by-Step Guide to Resetting Echo Dot

  • Locate the reset button.

  • Press and hold the button until the light turns orange.

  • Follow the prompts to complete the reset.

Instructions for Resetting Echo Show

  • Swipe down from the top of the screen.

  • Access the settings menu.

  • Select ‘Device Options’, then ‘Reset’.

How to Reset Echo Studio

  • Click and hold the microphone off and volume down buttons.

  • Wait for the light ring to turn off and then on again.

  • Release the buttons to initiate reset.

Reconfiguring Your Device After Reset

You need to set up your device as if it was new. This includes connecting to Wi-Fi and logging into your Amazon account.

Conclusion

Resetting your Amazon Alexa device is a straightforward process that can solve a variety of problems and refresh your device’s functionality. Whether you have an Echo Dot, Echo Show, or any other Alexa gadget. Remember, resetting your device will erase all custom settings and data, so it should be done carefully. With the steps outlined in this guide, you are now ready to confidently reset your Alexa device, ensuring that it will continue to be a valuable and efficient part of your smart home setup.

FAQs

  1. Will resetting my Alexa device delete all my data

    Yes, a reset will erase all your settings and data.

  2. Can I reset my Alexa device remotely?

    No, you need physical access to the device to reset it.

  3. How often should I reset my Alexa device?

    Only reset when necessary, such as when experiencing problems.

  4. Will resetting affect my smart home devices?

    Yes, you’ll need to reintegrate your smart home devices after a reset.

  5. Can I undo a reset?

    No, once a reset is done, it cannot be undone.

How to Easily Delete an eSIM from Your iPhone and Android Devices

How to Easily Delete an eSIM from Your iPhone and Android Devices

How to Easily Delete an eSIM from Your iPhone and Android Devices

Image Source: futurezoneacademy.com

The functions that are built into our smartphones get more and more varied as technology develops. Embedded SIMs, or eSIMs, are one such innovation that makes it easy to move between cell plans without a physical SIM card. You could eventually need to remove an eSIM from your iPhone or Android smartphone, though. This post will discuss how to remove an eSIM and the ramifications of doing so.

What Takes Place When an eSIM is Deleted:

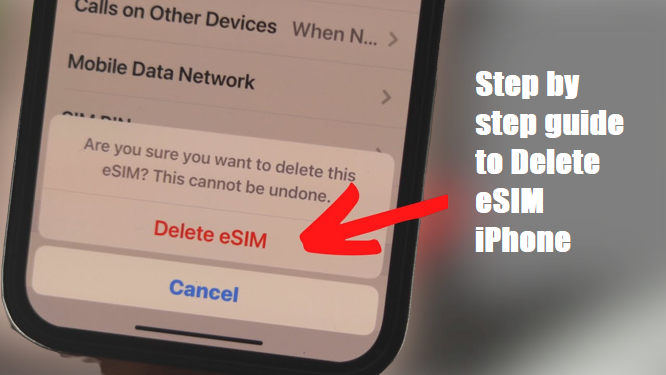
Eliminating an eSIM has serious repercussions since it stops all cellular service connected to that particular plan. This implies that the eSIM will not be able to make or receive calls, texts, or data access.

Furthermore, every piece of information and configuration on the eSIM—including contacts, messages, and network preferences—will be deleted. It’s important to understand that uninstalling an eSIM does not impact the validity of the eSIM plan you purchased; it merely removes services from your smartphone.

Because this step is irreversible, it is crucial to extract any required data from the eSIM before moving further. You should speak with your network service provider if you have any specific queries or worries.

How to Take Out of Your Phone an eSIM:

eSIM removal from iPhone:

  • Start the iPhone’s Settings app.
  • Press the “Mobile Service” button.
  • Choose the eSIM that you wish to remove.

It’s simple to remove the eSIM information from your iPhone. If you want to reactivate the service on your iPhone, you must have a physical SIM card with the same number.

Remove eSIM from Android device:

  • Launch the Settings application.
  • Next, select “Network and Internet.”
  • Choose “SIMs.”
  • Select the eSIM that you wish to remove.
  • After swiping down, select “Delete SIM.”
  • To verify your activity, press “Erase.”

The procedures outlined here for taking out an eSIM from an Android smartphone on a Pixel are also applicable to other Android handsets.

How to Turn Off eSIM on Your Smartphone:

Turning off eSIM is a workable alternative if you want to keep the services but disable its functionality. It can be difficult to recover an erased eSIM. Here’s

How to Disable the eSIM on Android and iPhone Devices:

Using an iPhone: Navigate to Mobile Service in Settings. Turn off the toggle after selecting the eSIM.

Open Settings -> Network & Internet -> SIMs on an Android device. To disable and switch off the “Use SIM” toggle, select the eSIM.

Conclusion

It’s critical to comprehend the ramifications of deleting an eSIM in order to properly manage the connectivity of your smartphone. If you want to keep the eSIM services, carefully follow the instructions and constantly think about turning it off instead than deleting it.

Guide to Activating LED Flash Notifications on Your iPhone 15, 14, and 13

Guide to Activating LED Flash Notifications on Your iPhone 15, 14, and 13

In the ever-evolving landscape of mobile technology, Apple’s iPhones have consistently led the way in terms of accessibility features. One such feature available in the iPhone 15, 14 and 13 models is LED flash notification. This tool could be a game-changer for users who need visual cues for incoming notifications.

What Are LED Flash Notifications on iPhone?

Guide to Activating LED Flash Notifications on Your iPhone 15, 14, and 13

Image Source: tomsguide.com

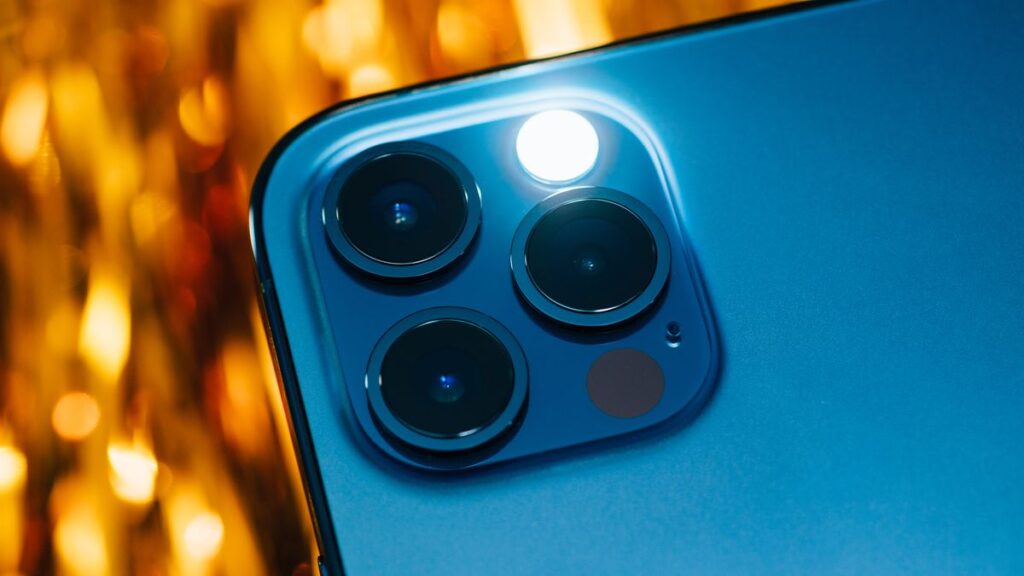
LED flash notifications use the iPhone’s camera flash to provide visual alerts for incoming calls, messages, and notifications. This feature is especially beneficial in noisy environments or for hearing impaired users.

Benefits of Using LED Flash Notifications

The primary benefit of LED flash notifications is that they provide a visual indicator of notifications, which is an excellent option for users who can’t always hear their phone’s ringtone or vibration.

Step-by-Step Guide to Turn On LED Flash Notifications

Turning on LED flash notifications is a simple process that can significantly enhance your experience with your iPhone, whether you have the latest iPhone 15 or older models like the 14 and 13.

  1. Open your phone ‘Settings’

  2. Scroll down and tap on ‘Accessibility.’

  3. Under the ‘Hearing’ section, find and tap on ‘Audio/Visual.’

  4. Toggle on ‘LED Flash for Alerts.’

Personalizing Your Notification Experience

Customization is important to get the most out of LED flash notifications. While the intensity of the LED flash cannot be changed, users can adjust the timing and frequency of the flash through the notification settings.

Understanding the Impact on Battery Life

While convenient, it’s important to note that using the LED flash for notifications can have a minor impact on your iPhone’s battery life.

Advanced Tips for Maximizing the Use of Flash Notifications

Combine flash notifications with other accessibility features like vibration alerts to make sure you never miss important notifications. Combining LED flash notifications with a screen flash or vibration can enhance the notification experience for all users, especially those with specific accessibility needs.

Troubleshooting Common Issues with Flash Notifications

Sometimes, users may face the issue of LED flash notifications not working as expected. Restarting the device or double-checking the settings can often solve these problems.

Integrating LED Flash Notifications into Daily iPhone Use

Incorporating LED flash notifications into your daily routine can ensure you stay connected and informed, no matter your surroundings or personal needs.

How to Easily Record WhatsApp Calls on iOS and Android: A Comprehensive Guide

How to Easily Record WhatsApp Calls on iOS and Android: A Comprehensive Guide

How to Easily Record WhatsApp Calls on iOS and Android: A Comprehensive Guide

WhatsApp has evolved into a versatile platform, not just for messaging, but also for video and voice calls. Despite its extensive features, WhatsApp lacks a built-in option to record voice calls. Fortunately, there are third-party applications that come to the rescue, enabling users to capture those important conversations. In this article, we’ll guide you through the process of recording WhatsApp voice calls on both Android and iOS devices.

Recording WhatsApp Voice Calls on Android

One of the reliable applications for recording WhatsApp voice calls on Android is Cube ACR. Follow these steps to seamlessly capture your conversations:

  1. Open the Google Play Store and search for the Cube Call application or [click here](link to the app).
  2. Install and open the Cube Call application, then switch to WhatsApp.
  3. During a WhatsApp call, you’ll notice the Cube Call widget. If not visible, open Cube Call and choose “Force VoIP call” as a voice call.
  4. The app will now automatically record WhatsApp voice calls, saving the files to your device’s internal memory.

Notably, Cube ACR isn’t limited to WhatsApp; it can also record voice calls from other applications like Slack, Zoom, Telegram, Signal, and more.

Recording WhatsApp Voice Calls on iPhone

Recording WhatsApp calls on an iPhone requires a workaround, utilizing a Mac and the QuickTime application:

  1. Download the QuickTime application on your Mac (available for free).
  2. Connect your iPhone to the Mac and open QuickTime.
  3. Under the “File” option, select “New Audio Recording.”
  4. Choose your iPhone as the audio source and tap the record button in QuickTime.
  5. Make a WhatsApp call using your iPhone and click on the add user icon.
  6. Your voice call will be recorded automatically, and the file will be saved on your Mac.

While the iPhone method involves an additional step with a Mac, it provides a reliable solution for recording WhatsApp voice calls on iOS devices.

In conclusion, third-party applications offer a way to fill the gap in WhatsApp’s functionality, allowing users to record voice calls seamlessly. Whether you’re an Android or iOS user, these methods ensure you can preserve important conversations with ease.