Your Tech Story

how to

The Ultimate Guide to Fixing Wireless Mouse Issues in Windows 11

The Ultimate Guide to Fixing Wireless Mouse Issues in Windows 11

Wireless mice offer convenience and freedom of movement, but like any technology, they can encounter issues. If you’re facing the frustration of a non-responsive wireless mouse on your Windows 11 PC, don’t worry – we’ve got you covered. In this guide, we’ll walk you through troubleshooting steps to get your wireless mouse back in action.

Why Is Your Wireless Mouse Not Working?

Understanding the possible causes of your wireless mouse issues is the first step toward finding a solution:

1. Battery Problems

The Ultimate Guide to Fixing Wireless Mouse Issues in Windows 11

Image Source: alphr.com

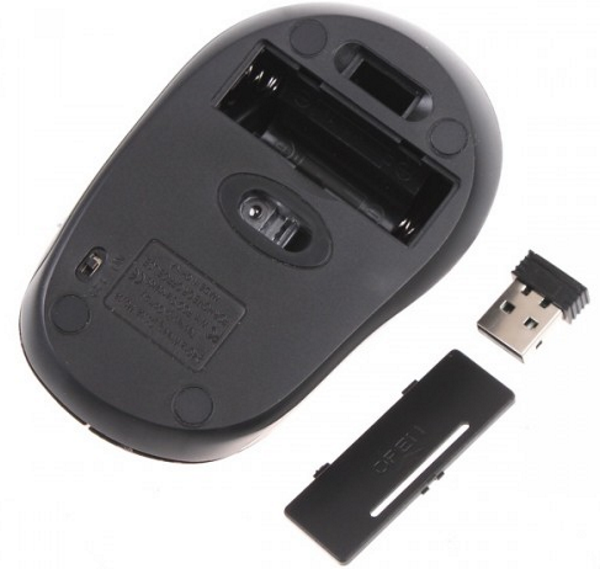
Battery problems often include rapid power depletion and poor contact points, leading to connectivity issues and inconsistent performance. Regularly checking and replacing batteries, and ensuring clean contact points, can resolve these common problems.

2. Connectivity Issues

Connectivity issues are commonly due to signal interference, weak batteries, or pairing glitches, leading to inconsistent cursor movements and response delays, necessitating troubleshooting for stable performance.

3. Driver Problems

Driver problems in wireless mice can cause unresponsiveness or erratic behavior, often due to outdated or corrupt software, requiring updates or reinstallation to ensure smooth and accurate cursor control.

4. Interference

Wireless mice may be affected by interference from other devices. Make sure there are no electronic devices nearby that could interfere with the signal.

5. Hardware Malfunction

If none of the above solutions work, it’s possible that your mouse has a hardware issue.

Step-by-Step Troubleshooting

Let’s address your wireless mouse issue with a step-by-step approach:

Check Batteries

  • Replace or recharge the batteries in your wireless mouse. Make sure they are inserted correctly.

Reconnect the Mouse

  • If your mouse has a USB receiver, unplug it and plug it back in. Make sure it is connected securely.

Restart Your PC

  • Restarting your PC can often resolve wireless mouse issues, as it refreshes system connections and resolves temporary software glitches that may be hindering mouse functionality.

Update Mouse Drivers

  • Updating mouse drivers is a key solution to fix issues with responsiveness and compatibility, ensuring smooth and efficient operation of your wireless mouse.

Test for Interference

  • Move any potential sources of interference away from your mouse and receiver.

Test with Another PC

  • To rule out hardware problems, test your wireless mouse on another computer. If it works there, the problem may be with your Windows 11 PC.

Check for Windows Updates

  • Make sure your Windows 11 operating system is up to date, as updates may include important fixes for hardware compatibility.

Conclusion

Your wireless mouse not working on Windows 11 can be frustrating, but most problems can be solved with a few simple troubleshooting steps. By checking the batteries, reconnecting the mouse, updating drivers, and addressing possible interference, you can probably get your mouse back to work.

FAQs

1. Why is my wireless mouse cursor moving irregularly?

Irregular cursor movement may be caused by interference or a dirty sensor. Make sure to have a clean and neat surface for your mouse.

2. Can I use a wired mouse as a temporary solution?

Yes, connecting a wired mouse can work as a temporary solution while you troubleshoot your wireless mouse.

3. How often should I replace wireless mouse batteries?

The frequency of battery replacement depends on usage. On average, wireless mouse batteries can last from several months to a year.

4. What should I do if my wireless mouse still doesn’t work after troubleshooting?

If your mouse remains unresponsive, consider contacting the manufacturer’s customer support or seeking professional help.

5. Are there any software tools for diagnosing wireless mouse issues on Windows 11?

Yes, some software tools can help diagnose and fix mouse-related problems on Windows 11. Check your mouse manufacturer’s website for such tools or consult online forums for recommendations.

How to Successfully Remove a Printer from Windows 10 and 11

How to Successfully Remove a Printer from Windows 10 and 11

How to Successfully Remove a Printer from Windows 10 and 11

Image Source: online-tech-tips.com

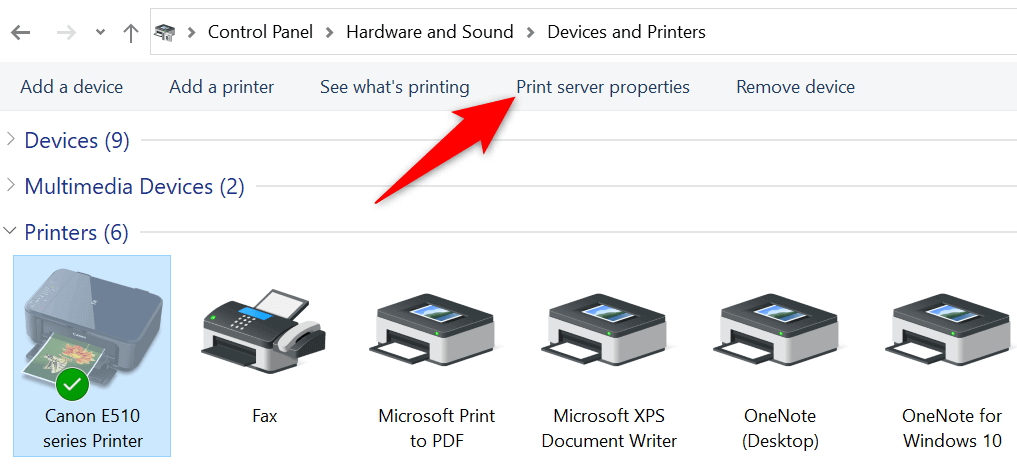
In the digital age, managing devices and peripherals like printers has become an essential part of our daily lives. However, there may come a time when you will need to remove a printer from your Windows 11 or Windows 10 PC. Whether you’re upgrading your printer, experiencing compatibility issues, or simply decluttering your device list, this guide will walk you through the steps to efficiently remove a printer from your Windows PC.

Why You Might Need to Remove a Printer

Before we get into the process, it’s important to understand why you want to remove the printer:

1. Upgrading or Replacing Your Printer

When you get a new printer or upgrade your existing printer, it is necessary to remove the old printer to avoid confusion and ensure proper installation of the new device.

2. Solving Compatibility Issues

If your printer isn’t working properly with your PC or if you’ve switched to a different model or brand, removing the old printer may resolve compatibility issues.

3. Decluttering Your Devices

Over time, your devices list may become cluttered with printers you no longer use. Deleting them can streamline your device management.

Step-by-Step Guide

Now, let’s move on to the process of removing a printer from your Windows 11 or Windows 10 PC:

  • Click the “Start” menu and select “Settings”.

  • In the Settings window, click the “Device” option.

  • On the left sidebar, select “Printers & Scanners.”

  • In the Printers and Scanners section, you will see a list of connected printers. Find the one you want to remove.

  • Click on the printer you want to remove and a “Remove Device” button will appear. Click it.

  • A confirmation dialog will appear, asking if you are sure you want to delete the printer. Confirm by clicking “Yes”.

  • The selected printer will be removed from your PC, and you will see it disappear from the list of printers and scanners.

Conclusion

Removing a printer from your Windows 11 or Windows 10 PC is a straightforward process that can help you maintain an organized and efficient device list. Whether you’re upgrading your printer, dealing with compatibility issues, or simply decluttering, following these steps will ensure a hassle-free experience.

FAQs

1. Can I remove multiple printers at once?

No, you will have to remove each printer individually by following the steps outlined in this guide.

2. Will removing a printer delete its drivers?

No, removing a printer will simply remove it from the list of connected devices on your PC. The printer drivers will remain intact unless you uninstall them separately.

3. Can I remove a printer if it’s offline?

Yes, you can remove the printer even when it is offline.

4. Is there a limit to how many printers I can connect to my Windows PC?

There is no strict limit to the number of printers you can connect, but it is recommended to keep your device list organized by removing printers you no longer use.

5. What should I do if I accidentally remove the wrong printer?

If you accidentally remove the wrong printer, you can easily reconnect it by following the printer setup process on your PC.

WhatsApp Web Security: How to Secure with a Strong Password

WhatsApp Web Security: How to Secure with a Strong Password

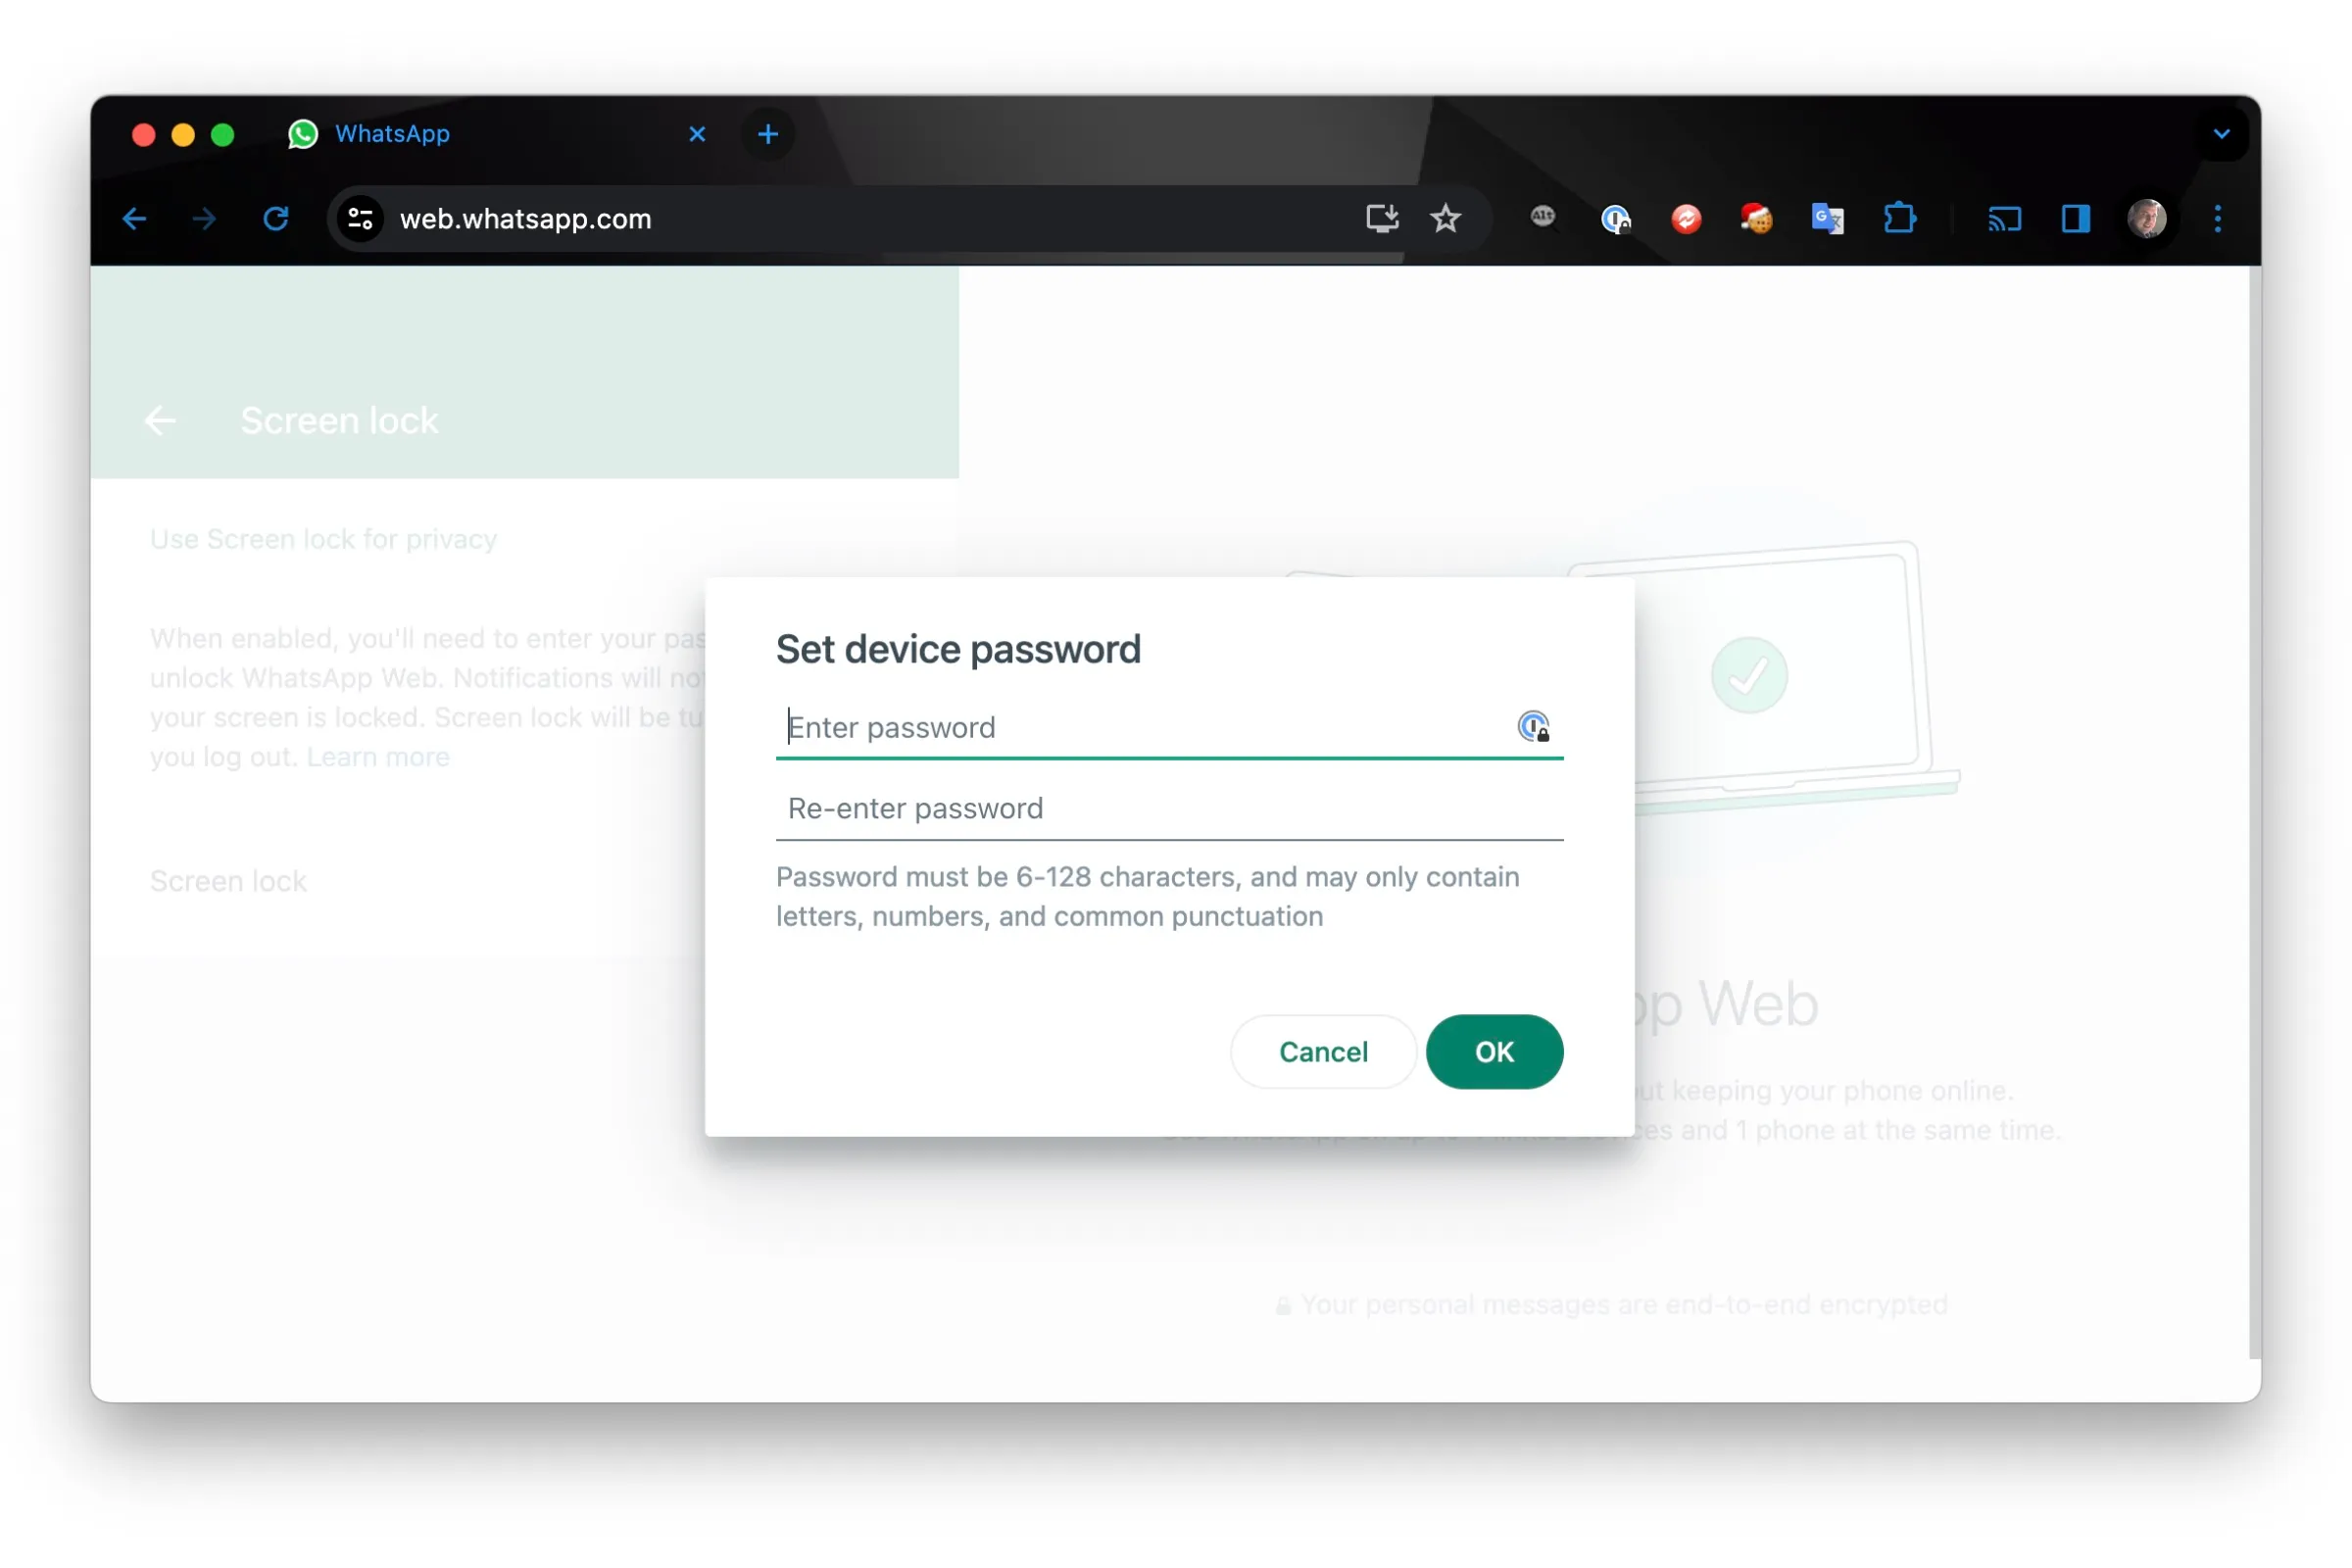
WhatsApp Web has become a staple in our digital communications, providing convenience and flexibility. However, with convenience also comes the need for security. In this comprehensive guide, we will learn how to password-protect WhatsApp Web.

Understanding WhatsApp Web

WhatsApp Web is the browser version of the popular messaging app, which allows users to send messages and files from their computers. Unlike mobile apps, it requires a constant connection to your phone.

The Importance of Securing WhatsApp Web

WhatsApp Web Security: How to Secure with a Strong Password

Image Source: digitaltrends.com

Securing WhatsApp Web is important because it mirrors messages from your mobile device, making it a potential target of unauthorized access and data breaches. It contains sensitive personal and professional communications which, if compromised, could lead to breach of privacy and misuse of information. Implementing security measures for WhatsApp Web ensures that your conversations remain private and protected from potential cyber threats, thereby maintaining the integrity and credibility of your digital interactions.

Setting Up a Password for WhatsApp Web

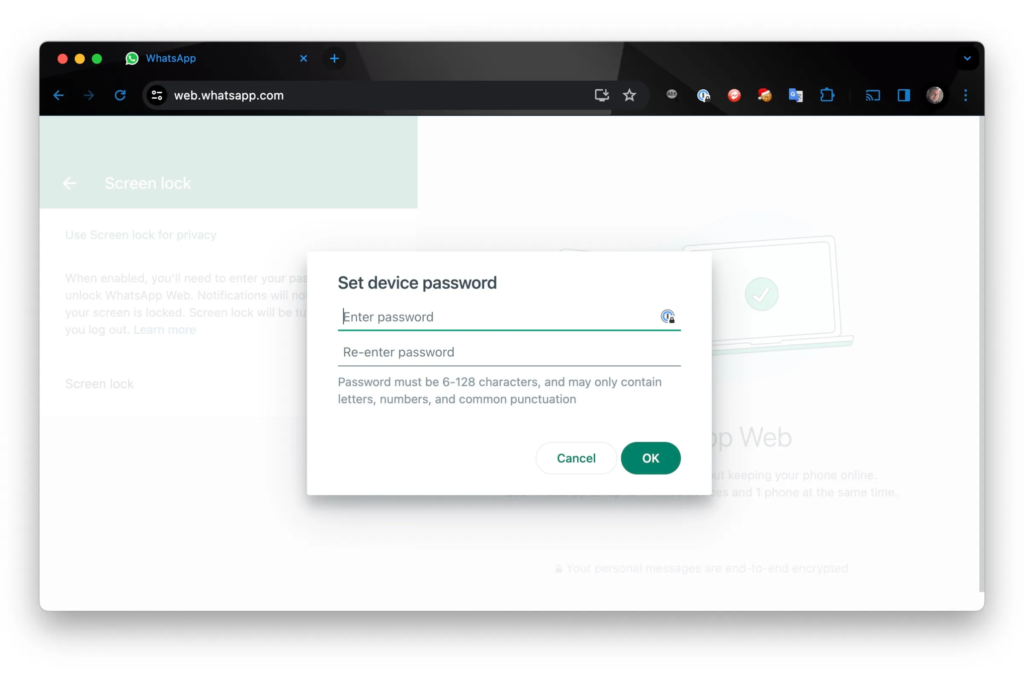
Setting a password for WhatsApp Web, although not a native feature, can be achieved using two-factor authentication and third-party browser extensions or security apps. These tools add an extra layer of security by requiring a password to access WhatsApp Web, thus keeping your messages and personal information safe from unauthorized access on shared or public computers.

Regularly Monitoring WhatsApp Web Sessions

Regularly monitoring your WhatsApp Web sessions is an important security practice. This involves checking which devices are currently accessing your WhatsApp account through the web interface. This process helps identify and disconnect any unauthorized or suspicious sessions that may pose a threat to your privacy and data security. By keeping a vigilant eye on active sessions, you can take immediate action if you notice access from an unknown device, protecting your personal information and conversations from potential misuse or breach.

What to do if someone accesses your WhatsApp?

If you suspect unauthorized access to your WhatsApp account, immediately log out of all active WhatsApp Web sessions, change your account password, and enable two-factor authentication for additional security. It is also advisable to inform contacts about a possible breach and be wary of suspicious messages or requests.

Educating Yourself on Digital Security

Educating yourself on digital security includes staying informed about the latest cybersecurity threats and best practices. This includes understanding how to keep personal information safe online, using strong passwords, enabling two-factor authentication, recognizing phishing attempts, and safely navigating digital platforms. This continuous learning process is important to protect against cyber risks.

Future Updates and Enhancements to WhatsApp Web Security

Future updates to WhatsApp Web Security are likely to emphasize advanced encryption, advanced two-factor authentication, and AI-powered threat detection. These improvements aim to strengthen user privacy and data security, adapt to emerging cybersecurity challenges, and ensure a safer, more secure online communications experience.

Conclusion

Password-protecting WhatsApp Web is an essential step in protecting your digital communications. With the right tools and practices, you can ensure that your conversations remain private and secure.

WhatsApp Screen Sharing Made Easy: Follow These Simple Steps

WhatsApp Screen Sharing Made Easy: Follow These Simple Steps

Screen sharing has become an essential tool in our digital toolkit, especially in apps like WhatsApp. Whether it’s for work, guiding someone through an app, or sharing content, knowing how to share your phone screen on WhatsApp can enhance your communication experience.

What is WhatsApp Screen Sharing?

WhatsApp Screen Sharing Made Easy: Follow These Simple Steps

Image Source: cellularnews.com

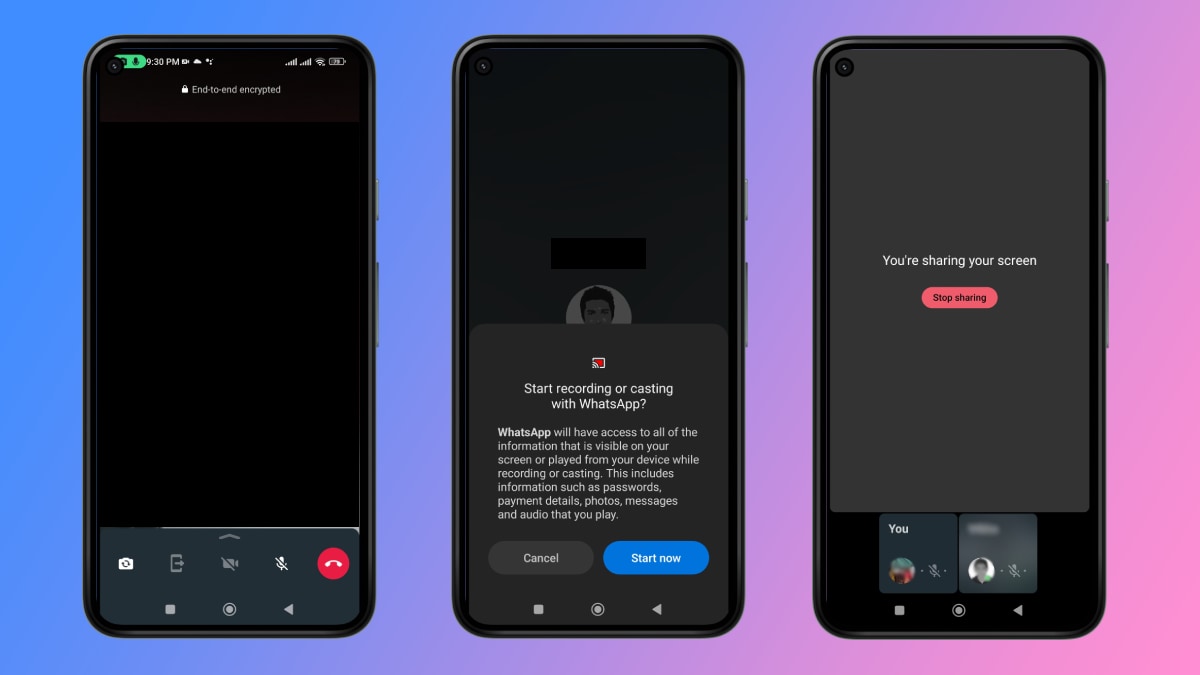
WhatsApp screen sharing is a feature that allows users to share the content of their phone’s screen in real-time during a voice or video call on the WhatsApp platform. It enables users to display apps, photos, documents, or any other content on their screen to the person they are communicating with, enhancing interaction and collaboration during WhatsApp calls.

Rumors have Surfaced After Musk’s Takeover

Screen sharing has become an essential tool in our digital toolkit, especially in apps like WhatsApp. Whether it’s for work, guiding someone through an app, or sharing content, knowing how to share your phone screen on WhatsApp can enhance your communication experience.

Step-by-Step Guide to Screen Sharing on WhatsApp

Sharing your screen on WhatsApp is a straightforward process that enhances your communication experience. Here’s a step-by-step guide on how to use the screen sharing feature on WhatsApp:

Update WhatsApp:

  • Make sure you have the latest version of WhatsApp.

Start a WhatsApp Call:

  • Open WhatsApp and go to the contact or group you want to share your screen with.

  • Start a voice or video call by tapping the call icon.

Activate Screen Sharing:

  • Once the call is connected, look for the screen-sharing icon. This icon usually looks like a monitor or a rectangular shape with an arrow.

  • Tap the screen sharing icon.

Grant Permission:

  • When you use this feature for the first time, WhatsApp may request permission to record your screen. Grant the necessary permissions.

Begin Sharing:

  • After granting permission, your phone screen will be visible to the person on the other end of the call.

  • Navigate through your phone as needed. The viewer will see everything displayed on your screen.

Stop Sharing:

  • To stop screen sharing, simply tap the screen sharing icon again or end the call.

  • Some versions of WhatsApp may show a stop button on your screen during sharing.

Ending the Call:

  • Once you’re finished sharing the screen, you can continue your call or end it by tapping the End Call button.

Remember, when you’re sharing your screen, everything that appears on your screen, including notifications, will be visible to the person on the other end. Make sure any sensitive or private information is hidden or notifications are turned off to maintain your privacy.

Troubleshooting Common Screen Sharing Issues

If you encounter issues like screen lag or disconnection, this section provides solutions to ensure smooth screen sharing.

Conclusion

Screen sharing on WhatsApp is a versatile and user-friendly feature that can enhance your communication and collaboration. By following these guidelines, you can get the most out of this functionality.

Step-by-Step Guide to Resolve Error Code 0xc0000001 on Windows 10/11

Step-by-Step Guide to Resolve Error Code 0xc0000001 on Windows 10/11

Step-by-Step Guide to Resolve Error Code 0xc0000001 on Windows 10/11

One of the confusing error codes that Windows users may run across is ‘Error Code 0xc0000001,’ which is frequently linked to the Blue Screen of Death (BSOD). Even if these kinds of mistakes might cause delays in work, there are practical solutions to deal with and fix this specific problem on Windows 10 or 11. Several solutions to the ‘Error Code 0xc0000001’ are shown below:

1. Launch the Tool for Startup Repair:

  • Choose the Startup Repair tool when you boot into the Advanced Startup menu.

  • Give the tool permission to examine and fix any possible Windows problems.

  • Restart your computer when it’s finished to see whether the issue is still there.

2. Make use of the Command Prompt:

Click the Advanced options menu to bring up the Command Prompt. One by one, type the following commands, pressing Enter after each one:

  • Copy the Bootrec /fixmbr code.

  • Fixboot / Bootrec

  • Bootrec /rebuildbcd Bootrec /scanos

  • Try a fresh PC reboot to see if anything has improved.

3. Unplug Every External Gadget:

  • Cut off all peripherals and external devices.

  • Reattach them after a brief while.

  • Sometimes problems arise from external devices; try this quick fix to see if it fixes the problem.

4. Enter Safe Mode:

  • Enter Safe Mode, turn off any newly installed third-party programs, and find any problems.

  • Reboot normally after removing the troublesome program in Safe Mode

5. Run a Windows System Restore:

  • This may be used to restore your computer to a time when it was operating properly.

  • Refer to the System Restore handbook for instructions.

6. Conduct a Malware Scan:

  • Use Microsoft Defender or your chosen antivirus program to conduct a malware scan.

  • Several PC problems, including boot failures, can be caused by malware.

7. Use a CHKDSK Scan:

  • To identify and resolve any hard disc problems, use the CHKDSK tool.

  • Run the following command in Command Prompt: chkdsk /f /r.

8. Reset Windows to the Factory Defaults:

  • Consider doing a Windows factory reset as a final option.

  • Before moving on, make sure you have backups of all important data.

  • Resolving ‘Error Code 0xc0000001’ necessitates a methodical approach, experimenting with various fixes until the problem is fixed. 

Users ought to select the approach that most closely matches their technical proficiency and circumstances. Before carrying out any significant operations, such as a factory reset, don’t forget to back up important data. By following these instructions, users should be able to resolve the BSOD issue and get their Windows 10 or 11 PCs back in working order.

Keep in mind that every system is different, therefore these solutions’ efficacy could differ. It could be wise to seek expert help if the issue continues.

How to Start Streaming on Twitch: A Step-by-Step Guide

How to Start Streaming on Twitch: A Step-by-Step Guide

Are you ready to start your streaming journey on Twitch? Whether you’re a gaming enthusiast, a creative artist, or just someone with a story to tell, Twitch offers a platform to share your passions with the world. Let’s dive into how you can start streaming on Twitch with ease.

What is Twitch?

How to Start Streaming on Twitch: A Step-by-Step Guide

Image Source: dacast.com

Twitch is a popular live-streaming platform that has become the central hub of online entertainment, especially for gamers. It allows users to broadcast themselves playing video games, creating art, cooking, or engaging in various other activities while interacting with a live audience via chat. Originally focused on video game live streaming, Twitch has expanded to include streams dedicated to music, talk shows, and even TV series watch-alongs. The platform is known for its community-driven approach, enabling viewers to support their favorite streamers through subscriptions, donations, and interactive chat features. 

Create a Twitch Account

Creating a Twitch account is a straightforward process, allowing you to step into the world of live streaming and community interaction. Here’s how you can get started:

  • Go to Twitch.tv.

  • Click the “Sign Up” button, usually located at the top right corner of the page.

  • Fill in the required fields including username, password, date of birth, and email address.

  • Password: Use a strong password for security.

  • Check your email inbox and click the verification link to activate your account.

Essential Equipment for Streaming

To start streaming on Twitch, it is important to have the right equipment to ensure a smooth and engaging streaming experience. Here is a list of what you will need:

  1. Computer: A reliable and powerful computer is fundamental.

  2. High-Quality Webcam: A good webcam is important for visual interaction. This helps you personalize your stream and connect with your audience.

  3. Microphone: Audio clarity is essential. A high-quality microphone can significantly improve the audience experience.

  4. Headphones: Good headphones are important for monitoring audio and clear communication, especially in multiplayer games.

  5. Lighting: Proper lighting is important for visibility. Ring lights or softbox lights can help eliminate shadows and illuminate your face evenly.

  6. Internet Connection: A stable and fast internet connection is important for streaming. Wired connections (Ethernet) are generally more reliable than wireless connections.

  7. Streaming Software: Broadcasting your gameplay requires software like OBS Studio, Streamlabs OBS, or Xsplit.

  8. Green Screen (optional):Green screen can be used to overlay different backgrounds, making your stream more attractive.

Building Your Twitch Community

Building a Twitch community involves creating a welcoming and engaging environment where regular interactions and high-quality content encourage viewer participation and loyalty. Consistency in streaming, active engagement with the audience, and leveraging social media for promotion are key elements. Collaborating with other streamers and fostering a positive, inclusive environment also plays an important role in developing and maintaining a vibrant community on Twitch.

Monetizing Your Twitch Stream

Monetizing your Twitch stream involves taking advantage of various revenue streams such as viewer subscriptions, advertising, donations, and sponsorships. Twitch affiliates and partners can earn through subscriptions and Bits, while integrating external services like PayPal for direct donations. Engaging content and a dedicated audience base are key to attracting sponsorship and advertising revenue, with monetization becoming a mix of consistent streaming, community building, and strategic marketing.

Conclusion

In Conclusion, streaming on Twitch is an exciting venture that blends creativity, community engagement, and technical know-how. With the right equipment, a consistent streaming schedule, and a focus on creating engaging content, anyone can embark on this rewarding journey. Building a community and potentially monetizing your channel are achievable goals, making Twitch streaming a gratifying experience for both hobbyists and aspiring professionals.