Your Tech Story

how to

How to Find, Download, and Change Wallpaper on Apple Watch

How to Reset the Apple Watch?

In the world of wearables, the Apple Watch stands out as the pinnacle of technology, blending style with functionality. Whether you’re upgrading, troubleshooting, or just starting fresh, resetting your Apple Watch can be an important step. This guide reveals the secrets of the process, ensuring you can reset your device with confidence.

Resetting your Apple Watch isn’t just about clearing glitches. This is a step taken for a variety of reasons, from preparing the device for a new owner to refreshing its settings for a cleaner, smoother experience.

Why Reset Your Apple Watch?

How to Find, Download, and Change Wallpaper on Apple Watch

Resetting can be a big relief for many common Apple Watch problems, from software issues to battery issues. This is also necessary if you are giving your watch to someone else and you need to securely erase your data.

Preparing to Reset

Backup Your Data

First things first: ensure the security of your data. Your Apple Watch automatically backs up your paired iPhone, so make sure this sync is recent enough to save your settings, messages, and health data.

Ensure WatchOS is Updated

Updating your Apple Watch to the latest version of watchOS can sometimes resolve issues without requiring a reset. Check for updates to the Apple Watch app on your iPhone.

Step-by-Step Guide to Resetting Your Apple Watch

Hard Reset

A hard reset, or force restart, does not erase any data. This is a quick fix for frozen screens or unresponsive apps.

  • Press and hold both side buttons for at least 10 seconds.

  • Release when the Apple logo coming.

Factory Reset

For a clean slate, a factory reset removes all data from your Apple Watch.

From the Apple Watch:

  • Go to Settings > General > Reset > Erase All Content and Settings.

  • Enter your passcode and confirm.

From the Paired iPhone:

  • Open the Apple Watch app.

  • Tap General > Reset > Erase Apple Watch Content and Settings.

  • Confirm and enter your Apple ID if prompted.

Post-Reset Steps

Restoring Data from Backup

After a factory reset, you can restore your Apple Watch from a backup during the re-pairing process with your iPhone. Select Restore from Backup and choose the latest backup.

Re-pairing with Your iPhone

Follow the on-screen instructions in the Apple Watch app on your iPhone to pair your watch again. This process also provides the option to restore from a backup.

Troubleshooting Common Issues

If your Apple Watch won’t reset or can’t pair after a reset, make sure it’s charged and within range of your iPhone. Consult Apple Support for persistent problems.

Conclusion

Resetting your Apple Watch can breathe new life into your device, whether you’re troubleshooting or preparing it for a new owner. Follow these steps for a smooth transition.

How to Pair an Xbox Controller with Your Xbox

How to Pair an Xbox Controller with Your Xbox

How to Pair an Xbox Controller with Your Xbox

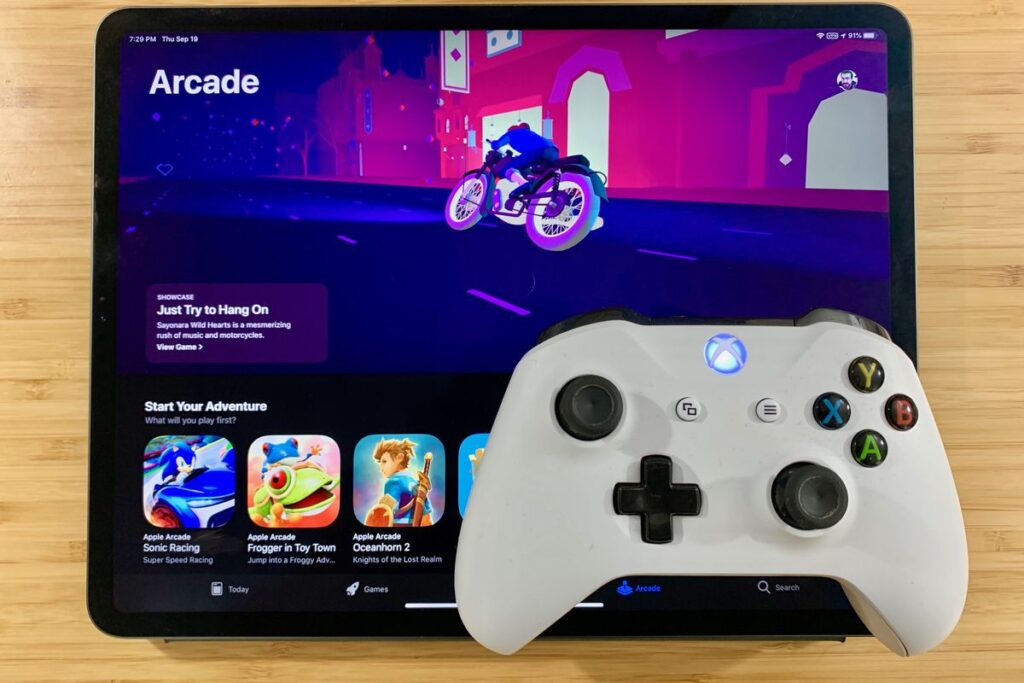
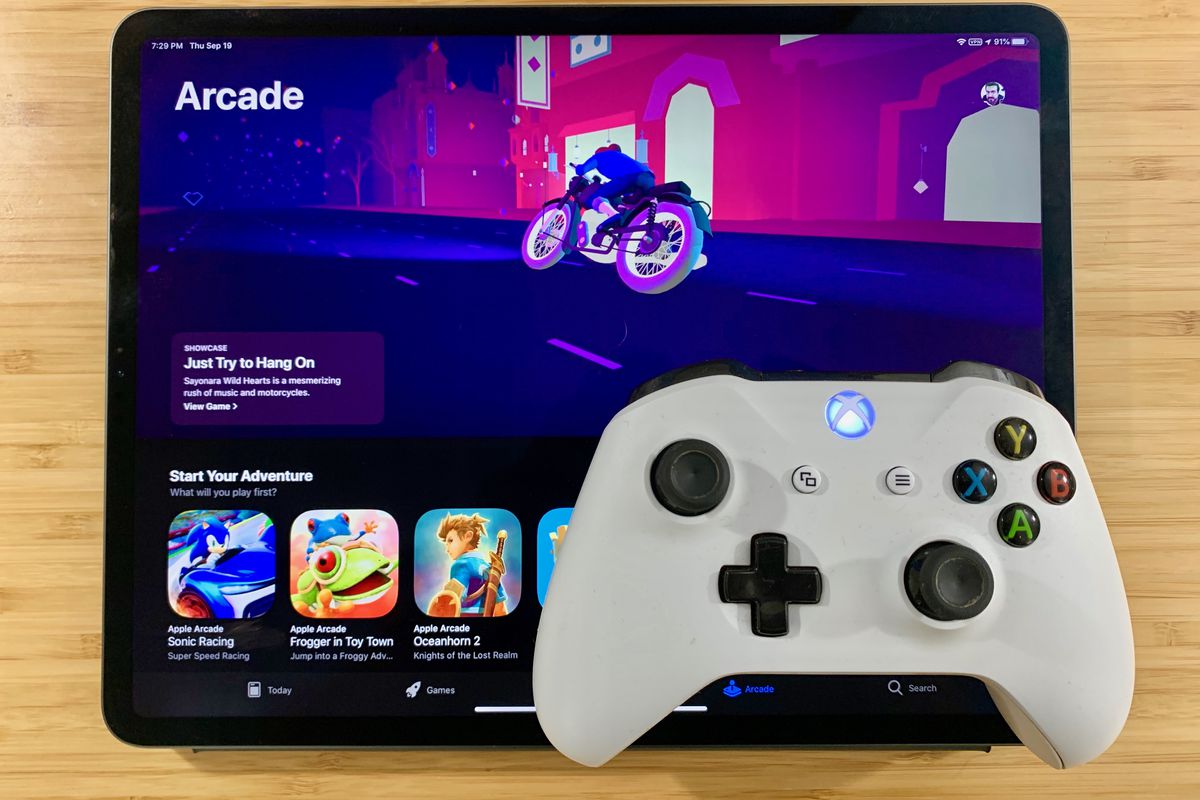
Image Source: polygon.com

Connecting your Xbox controller to your Xbox console is a straightforward process that allows you to seamlessly dive into your favorite games with precision control. Whether you’re setting up a new controller or reconnecting an existing one, follow these simple steps to ensure a hassle-free gaming experience.

Wired Connection:

1. Gather Your Equipment: Ensure you have your Xbox controller and a micro-USB cable ready. The micro-USB cable is typically included with the Xbox controller or can be purchased separately.

2. Locate the USB Port: On your Xbox console, locate the USB port. Depending on the model of your Xbox, the USB port may be located on the front, back, or side of the console.

3. Connect the Controller: Plug one end of the micro-USB cable into the controller and the other end into the USB port on your Xbox console.

4. Power On Your Xbox: Press the Xbox button on your controller to power on the console. Your Xbox should recognize the controller automatically, and you’re ready to start gaming.

Wireless Connection:

1. Prepare Your Controller: If you haven’t already done so, insert batteries into your Xbox controller. Alternatively, you can use a rechargeable battery pack.

2. Turn on Your Xbox: Press the power button on your Xbox console to turn it on.

3. Activate Pairing Mode: Press and hold the Xbox button on your controller until the Xbox button begins to flash rapidly. This indicates that the controller is in pairing mode.

4. Sync with Xbox: On your Xbox console, press the pairing button. The location of the pairing button varies depending on the model of your Xbox. Refer to your Xbox’s user manual for specific instructions.

5. Wait for Connection: Allow a few moments for the controller and console to sync. Once synced, the Xbox button on the controller will remain lit, indicating a successful connection.

6. Test the Connection: Press buttons on the controller to ensure it’s responding correctly. You’re now ready to enjoy wireless gaming on your Xbox.

Additional Tips:

Firmware Updates: Occasionally, Microsoft releases firmware updates for Xbox controllers to improve performance and add features. Keep your controller up-to-date by connecting it to your Xbox console or PC and following the on-screen prompts to install any available updates.

Troubleshooting: If you encounter any issues during the connection process, such as the controller not syncing or responding properly, try restarting your Xbox console and repeating the steps. If problems persist, consult the Xbox support website or contact customer service for assistance.

By following these simple steps, you can easily connect your Xbox controller to your Xbox console, whether you prefer a wired or wireless connection. Now, immerse yourself in the world of gaming and enjoy countless hours of entertainment.

How to Protect Yourself From AI Voice Cloning Scams

How to Protect Yourself From AI Voice Cloning Scams

As AI technology advances, so do the capabilities of scammers seeking to exploit it for fraudulent purposes. From political manipulation to personal financial scams, AI voice cloning poses a significant threat to individuals and society as a whole. Here are some essential strategies to defend yourself against these increasingly sophisticated schemes:

Fact-Check and Verify

How to Protect Yourself From AI Voice Cloning Scams

Image Source: elearningindustry.com

One of the most effective ways to protect yourself from AI voice scams is to fact-check and verify any suspicious communications. Whether it’s a robocall impersonating a public figure or a supposed family member asking for money, take the time to confirm the authenticity of the message. Utilize trusted sources and conduct online research to cross-reference information and identify potential scams.

End the Call

If you receive a call from an unknown number or encounter a suspicious situation, trust your instincts and end the communication. Avoid engaging with the caller and refrain from providing any personal or financial information. Instead, reach out to the purported individual or organization using verified contact information to confirm the legitimacy of the request. By terminating the call promptly, you can mitigate the risk of inadvertently providing scammers with valuable voice data.

Stay Vigilant

Remain vigilant and aware of the evolving tactics employed by scammers utilizing AI voice cloning technology. Stay informed about recent scams and consumer alerts issued by regulatory agencies and law enforcement authorities. Educate yourself and your loved ones about the potential dangers of AI voice scams and encourage them to adopt cautious communication practices.

Report Suspicious Activity

If you encounter a suspected AI voice cloning scam or believe you have been targeted by fraudulent activity, report it to the appropriate authorities immediately. Contact your local law enforcement agency, as well as relevant consumer protection agencies such as the Federal Trade Commission (FTC). By reporting incidents of scamming, you can contribute to ongoing efforts to combat cybercrime and protect others from falling victim to similar schemes.

Utilize Security Measures

Consider implementing additional security measures to safeguard against AI voice cloning scams. Explore options such as call-blocking apps, spam filters, and two-factor authentication for sensitive accounts. Be proactive in updating your security settings and software to stay ahead of emerging threats and vulnerabilities.

Educate Others

Share your knowledge and experiences regarding AI voice cloning scams with friends, family, and colleagues. Encourage open dialogue about cybersecurity awareness and the importance of exercising caution when interacting with unfamiliar callers or messages. By collectively raising awareness and promoting responsible communication practices, we can collectively defend against the proliferation of AI voice cloning scams.

In conclusion, defending yourself against AI voice cloning scams requires a combination of vigilance, verification, and proactive measures. By staying informed, remaining cautious, and taking decisive action when necessary, you can protect yourself and others from falling victim to these deceptive tactics.

How To Delete Your YouTube Channel: Step-by-Step Guide

How To Delete Your YouTube Channel: Step-by-Step Guide

In this digital age, our online presence often evolves as we explore different platforms and content creation. However, there may come a time when you decide to move away from a platform like YouTube. Deleting your YouTube channel may seem like a daunting task, but fear not; I will guide you through the process step by step. In this article, we will discuss how to delete your YouTube channel while keeping your content and subscribers in mind.

Understanding the Consequences

How To Delete Your YouTube Channel: Step-by-Step Guide

Before we dive into the deletion process, it is important to understand its implications. Deleting your YouTube channel is permanent, and there is no way to reverse it. You will lose all your videos, comments and other data associated with the channel. Take a moment to consider whether this is the right decision for you.

Backing Up Your Content

If you’ve decided to delete your YouTube channel, the first step is to backup your content. This ensures that you have a copy of your video and data for future reference. You can download your videos using YouTube’s built-in features or third-party tools.

Deleting the YouTube Channel

Now, let’s get started with the actual deletion process:

  • Open your web browser and go to YouTube.com.

  • Sign in to the Google account that is connected to the YouTube channel you want to delete.

  • Click on your profile picture in the upper right corner of the YouTube homepage.

  • Select “YouTube Studio” from the dropdown menu.

  • In YouTube Studio, click “Settings” in the left sidebar.

  • Go to the “Channel” section.

  • Click on “Advanced settings.”

  • Scroll to the bottom of the page and find the “Delete Channel” option.

  • You will be asked to enter your Google Account password for verification.

  • Confirm your intention to delete the channel.

Conclusion

Congratulations! You have successfully deleted your YouTube channel. Remember that this action is irreversible, so be completely sure of your decision before proceeding. If you ever want to return to YouTube, you can always create a new channel and start fresh.

FAQs

  1. Can I recover my deleted YouTube channel? No, once you delete your YouTube channel, it’s gone forever. There is no way to recover it or its contents.

  2. Is there a waiting period before the channel is permanently deleted? Yes, there is a 30-day grace period after deletion during which you can change your mind and restore your channel.

  3. What happens to my subscribers when I delete my channel? Your subscribers will no longer be able to access your content, and will not be notified of the deletion.

  4. Do I lose my YouTube earnings when I delete my channel? Yes, any unpaid earnings will be confiscated, and you will not receive any future payments. Make sure you have withdrawn your earnings before deleting your channel.

  5. Can I delete my YouTube channel on the mobile app? The deletion process is easy to navigate on a computer. It is recommended to use a web browser for this task.

How to Add Google Calendar Event Via Gmail: Quick Tips

How to Add Google Calendar Event Via Gmail: Quick Tips

How to Add Google Calendar Event Via Gmail: Quick Tips

Image Source: cedarville.edu

Have you ever been scrambling to find a date or event detail that you thought you had quickly written down somewhere? If this sounds like you, don’t panic; there is an easy fix for it. Making Google Calendar events straight from Gmail may transform your life by preventing you from ever missing another deadline or significant occasion. Let’s examine the detailed procedure and delve into this productivity trick.


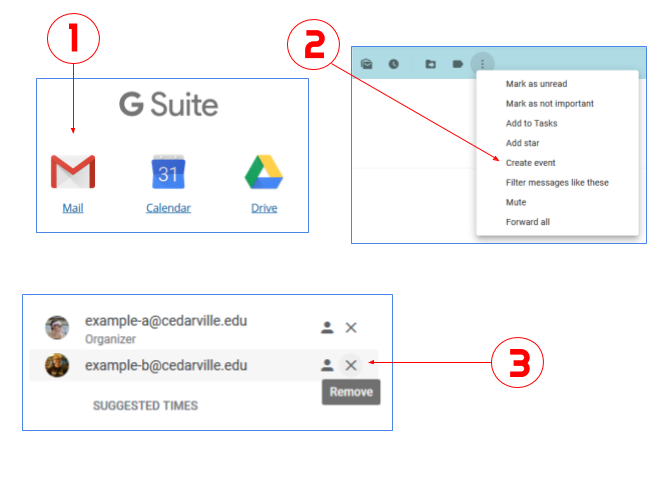
Step 1: Start Gmail

Open Gmail on your phone or computer to get started. The procedure is the same on both systems, giving users freedom.

Step 2: Click on the Email or Event

Open the email or message that has the pertinent details you want to add to your Google Calendar. 

This approach guarantees smooth integration, regardless of the meeting time, project deadline, or any other important information.

Step 3: Construct an Event

Find the “More” toggle (three dots) in the upper-right corner of the email at the top. You will see a drop-down menu with the option to “Create event.”

Step 4: "Allow" Notifications.

Once you click “Create event,” a new window will open and ask if you wish to accept calendar notifications. Selecting alerts guarantees that you get reminders on time. To make this feature active, click “Allow”. Keep in mind that these alerts seem like normal phone or computer notifications, which sets them apart from typical in-browser or in-app reminders.

Step 5: Complete the Information

Although the linked email subject may automatically appear in the subject line, you are free to change it to suit your tastes. Modify the event’s information, such as the time, place, attendees, and reminders that are planned. Use the “Notification” toggle (bell) to set a reminder and select the desired notification period.

Step 6: Save

After completing the information, click the blue “Save” button located in the upper-right corner. You’ve been able to successfully create an event on Google Calendar right from Gmail. You may quickly update information on the event card by editing it if something changes.

Adding Events to Your Calendar from Your Phone

You must manually open the Calendar app and create a new event in order to add an event from your phone. To add a task straight from Gmail to Google Tasks, click the three dots in the upper-right corner of the email and select “Add to tasks.” Before adding a task, make sure you have downloaded the Tasks app.

Putting Events in Google Calendar That Are Permanent

After creating an event, you can choose a repetition range from the drop-down menu or click the “All Day” option to have the event repeat. You may customise Google Calendar to include weekly, monthly, or annual repeats.

 
Why Instagram's Last Active is Not Showing and How to Enable it?

Why Instagram’s Last Active is Not Showing and How to Enable it?

Instagram has become a ubiquitous part of our social lives, connecting us with friends, family, and even celebrities. One feature that is often overlooked but plays an important role in this social interaction is the “last active” state. This little information can help us understand when our friends are online or when they have recently checked the app. But what happens when this feature mysteriously disappears or doesn’t work as expected?

The Mystery of Missing Last Active

You’ve probably experienced this yourself – visiting a friend’s chat window only to find the last active status conspicuously absent. Before getting into the intricacies of why this happens, it’s important to understand the basics.

Understanding Instagram's Activity Status Feature

Why Instagram's Last Active is Not Showing and How to Enable it?

Activity status on Instagram shows when a user was last active on the app or when they are currently active. But it’s not just a simple to switch. Privacy concerns have led Instagram to provide settings that control who sees this information.

How to Turn On Activity Status

Turning on your activity status is straightforward.

  • Launch the Instagram app on your device.

  • Tap your profile icon in the bottom right.

  • Tap the menu (three lines) in the top right, then select ‘Settings’.

  • In the Settings menu, select ‘Privacy’.

  • Scroll down to ‘Activity Status’ under Privacy Settings.

  • Turn on the ‘Show activity status’ toggle (it will turn blue).

Reasons Why Last Active Might Not Show

If your activity status is on but you still can’t see the last active status of others, it may be because they have turned off their activity. Remember, this feature is reciprocal – if you hide your status, you can’t see others too.

The Impact of User Behavior

User behavior can also affect the visibility of Last Active. Irregular movement patterns may cause the position to appear incorrect or delayed.

Conclusion

In conclusion, Instagram’s Last Active feature is a useful tool for staying in touch, but it is subject to various factors such as privacy settings, technical issues, and user behavior. Understanding these can improve your Instagram experience while respecting the privacy of others.

FAQs

  1. Can I see Last Active if someone has muted me?

    • No, muting affects the visibility of the Last Active status.

  2. Does Last Active show for all followers?

    • Only when the activity status of both parties is On.

  1. Is it possible to see Last Active without being friends?

    • No, you need to follow each other for this feature to work.

  2. Can I hide my Last Active status from a specific user?

    • Instagram currently does not allow selectively hiding activity status.

  1. Why is my Last Active status showing the wrong time?

    • This may be due to some disorder or irregular activity pattern.