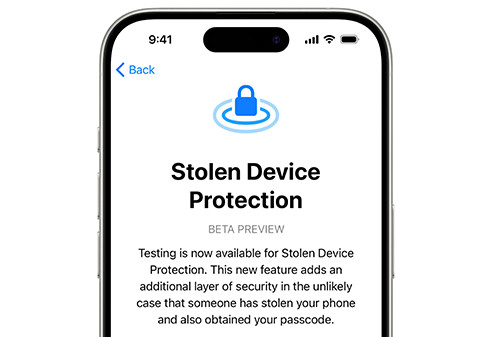
In today’s digital age, safeguarding our devices and personal data is paramount. With the advent of iOS 17.3, Apple has introduced a robust feature called Stolen Device Protection, designed to thwart unauthorized access to your iPhone in the unfortunate event of theft. This article will guide you through the process of activating and utilizing this invaluable security measure.
Understanding Stolen Device Protection

Stolen Device Protection serves as a shield against unauthorized access to your iPhone, particularly when someone has stolen it and possesses knowledge of your passcode. This feature becomes particularly crucial when you find yourself in unfamiliar surroundings, away from the safety of your home or workplace. By implementing Stolen Device Protection, crucial device and Apple ID account operations such as altering your device passcode or Apple ID password become inaccessible to unauthorized individuals without biometric authentication via Face ID or Touch ID, with no passcode fallback option.
Activating Stolen Device Protection
Activating Stolen Device Protection is a straightforward process:
- Access Settings: Navigate to the Settings app on your iPhone.
- Set Up Biometric Authentication: Depending on your iPhone model, either tap on “Face ID & Passcode” or “Touch ID & Passcode” and enter your passcode when prompted.
- Enable Stolen Device Protection: Scroll down to locate the “Stolen Device Protection” section within the settings menu and tap on “Turn On Protection.”
Note: If you don’t immediately see the Stolen Device Protection section, ensure that you’ve set up Face ID or Touch ID on your device beforehand.
Utilizing Stolen Device Protection
Once activated, Stolen Device Protection fortifies your device against unauthorized access. However, it’s crucial to understand how to navigate this feature effectively:
Security Delay: Certain sensitive operations trigger a Security Delay, which requires a successful biometric authentication (Face ID or Touch ID), followed by an hour-long waiting period, and then another successful biometric authentication. This delay mechanism acts as an additional layer of defense, preventing unauthorized individuals from making changes that could compromise your device or Apple ID account.
Activation of Lost Mode: In the event of theft or loss, Stolen Device Protection provides you with crucial time to activate Lost Mode using the Find My app or Find Devices feature on iCloud.com. This feature helps track and secure your device remotely, mitigating potential data breaches or misuse.
Deactivating Stolen Device Protection
Should the need arise to deactivate Stolen Device Protection, follow these steps:
- Access Settings: Open the Settings app on your iPhone.
- Biometric Authentication: Tap on either “Face ID & Passcode” or “Touch ID & Passcode” and enter your passcode as prompted.
- Disable Stolen Device Protection: Scroll down to the “Stolen Device Protection” section and tap on “Turn Off Protection.”
- Security Delay: If you’re not in a familiar location, initiating the deactivation process will prompt a Security Delay. Simply tap on “Start Security Delay” and follow the on-screen instructions to proceed.
By adhering to these steps, you can effectively activate, utilize, and deactivate Stolen Device Protection, bolstering the security of your iPhone and safeguarding your sensitive data against unauthorized access.
In conclusion, Stolen Device Protection emerges as a crucial security feature within iOS 17.3, offering users peace of mind and robust protection against the threat of device theft or unauthorized access. By leveraging biometric authentication and implementing Security Delays, Apple empowers users to take proactive measures in safeguarding their digital assets. So, ensure you activate Stolen Device Protection on your iPhone today and stay one step ahead in protecting your personal information.

I am a law graduate from NLU Lucknow. I have a flair for creative writing and hence in my free time work as a freelance content writer.